
Architectural perspective
The vendor self-invoice is a document that the company uses to declare the VAT outgoing recognized during a purchase, but thar it’s not present on the vendor’s invoice. It happened, for example, in Europe when we purchased some extra-UE services (for example, for a D365FO implementation service from Avanade Canada). The original vendor invoice doesn’t contain the sales tax because it’s not a domestic vendor. However, legally we have the right to recognize an VAT outgoing from your transaction.
So, the self-invoice is a virtual document with the only aim of declaring and recognizing the VAT outgoing. This virtual document is addressed to us (our company) and closed immediately because we don’t have a real debit with ourselves.
For a better understanding, below is an example of a general entry:
| ID | Event | Main account | Debit | Credit |
| 1 | Self-Invoice | Vendor (ourselves) | 122 | |
| 2 | Self-Invoice | Cost | 100 | |
| 3 | Self-Invoice | VAT outgoing | 22 | |
| 4 | Payment COD | Vendor (ourselves) | 122 | |
| 5 | Payment COD | Cost | 122 |
An additional last consideration: usually, the self-invoice can be cumulative. It means that at the end of the month, you can perform a single invoice with the total of the vendor invoice cumulated impact by this case (it’s not mandatory to have a relation between 1 self-invoice and 1 vendor invoice).
Solution D365FO
Now, go forward to understand how to perform the entry in D365FO. Firstly, we need to understand the constraint to respect. I’m going to take the case of the self-invoice in Italy: we need also to sent as XML to the SDI system.
| ID | Event | Main account | Debit | Credit | Component D365FO source |
| 1 | Self-Invoice | Company | 122 | Vendor posting profile | |
| 2 | Self-Invoice | Cost | 100 | Items/category posting profile or insert manually free text invoices line | |
| 3 | Self-Invoice | VAT outgoing | 22 | Sales tax | |
| 4 | Payment COD | Company | 122 | COD terms of payment | |
| 5 | Payment COD | Cost | 122 | COD terms of payment |
Different things:
- Original vendor invoice: post as usual. So, with a zero VAT or applying the reverse charge (case of UE);
- SDI: From 2023, the XML sending is available also for the vendor invoice. However, if you feel more confident, you can substitute the vendor with a self-customer. There is no difference; it must contain the company’s data (address, etc….);
- You can use a free text invoice or an order (sales or purchase). Pay attention: that the clearing account main account used on the transaction should be equal to what we have configured in the payment term (see the account matrix; it’s the main account present in the ID=2 and ID=5);
- Insert as net amount, the original vendor invoice net amount. If you do one entry at the end of the month, it’s the sum of the net amount of all vendor invoices touch by this case in this period
I’m going to perform an example of an invoice solution in D365FO based on the vendor fee text invoice in the Italian localization. The free text invoice will be entered as a Pending invoice.
Configuration
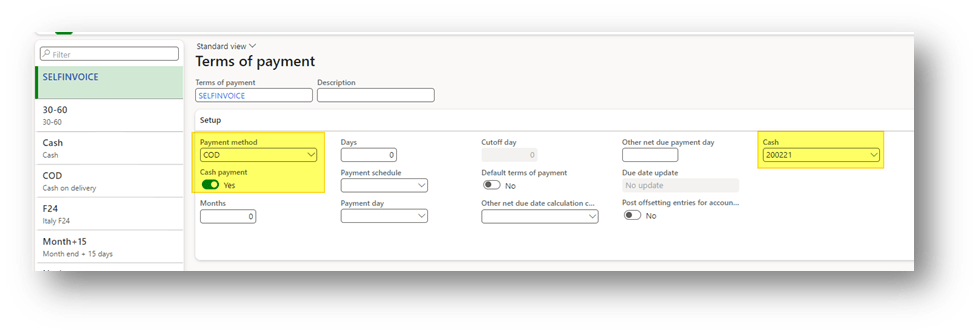
- Create a Payment terms COD
Go to: Accounts payable> Payment setup> Terms of payment.
Create a terms of payment COD. The system will close the vendor invoice contemporarily to the posting. Insert your clearing account to use as offset (see the account matrix; it’s the main account present in the ID=2 and ID=5).
- Configuration SDI for vendor
It’s an off-topic because it is not strictly related to the self-invoice. For more details, check out this guide: https://learn.microsoft.com/en-us/dynamics365/finance/localizations/italy/emea-ita-vend-e-invoices
Keep in mind that usually, the self-invoice has a dedicated document type. So, create a dedicated sales tax code and insert the correct document type (like TD17):
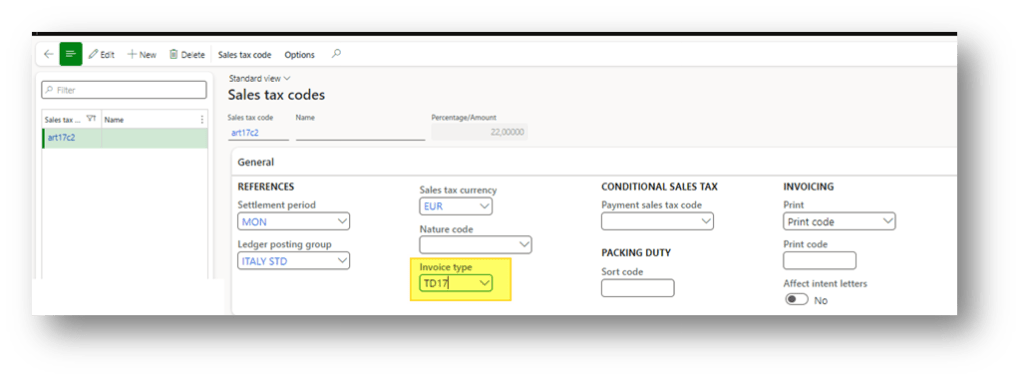
Configure this new code in the most appropriate sales tax group and items sales tax group combination.
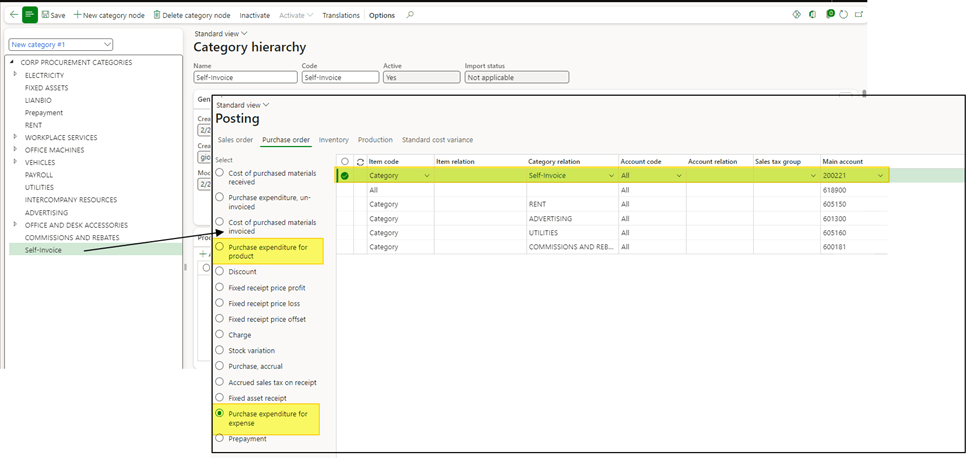
- Procurement categories
I’m going to use the pending invoice. So, I’ve created a new category. In the inventory posting configuration, insert your clearing account (see the account matrix; it’s the main account present in the ID=2 and ID=5).
Process
- Create self invoice
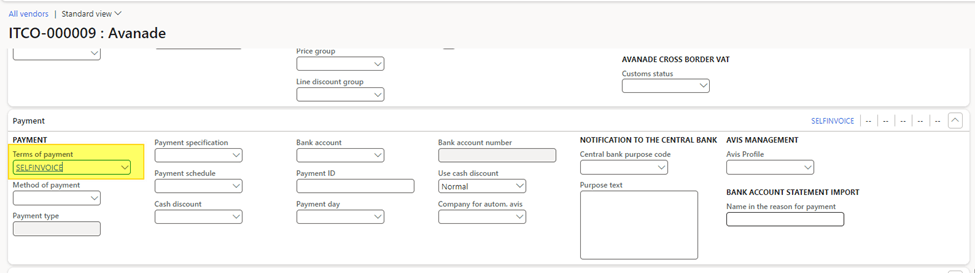
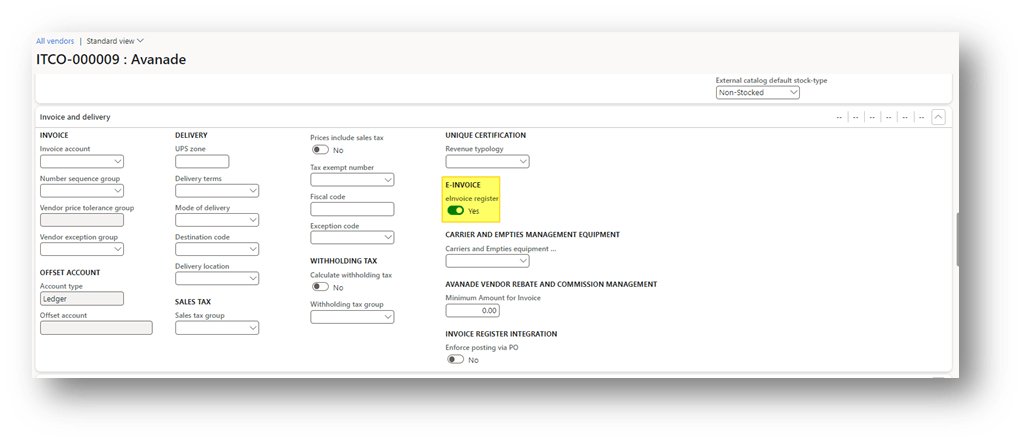
Create a new vendor. Just make sure that all information are inserted correctly (name, address, contact, VAT number, tax exemption number, etc…). Remember to insert the payment term created previously:
In the case of electronic invoices check this flag:
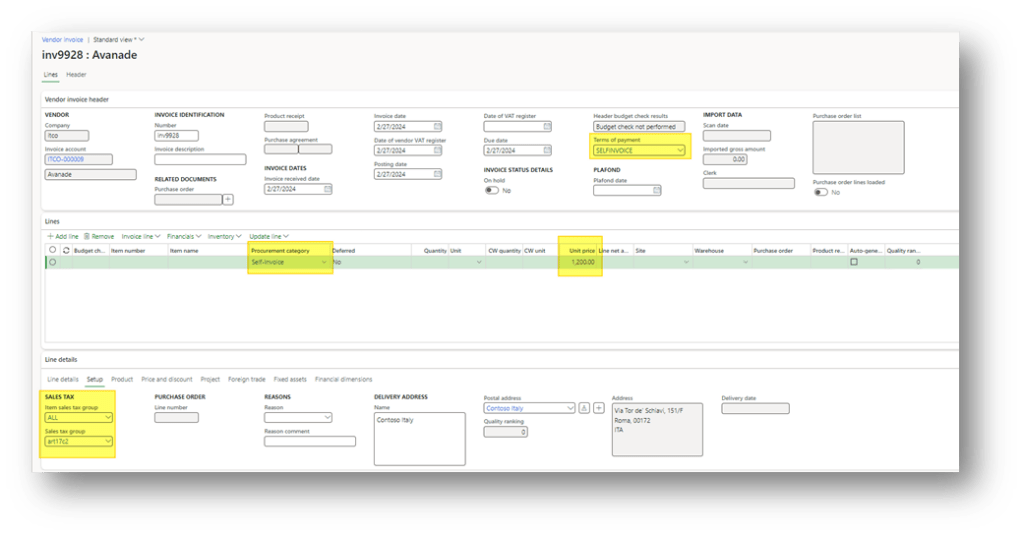
2. Create and post the free text invoice
Create the self-invoice with your self-vendor. Remember to use the right procurement categories and the sales tax group combination to obtain the desired sales tax code.
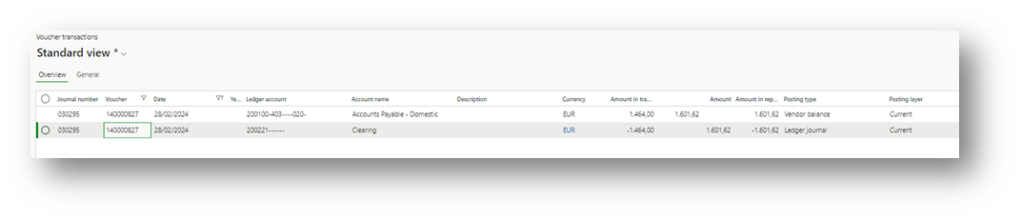
As you can see during the posing, the system creates the vendor invoice general entry:

Contemporary, the system closes the invoice:
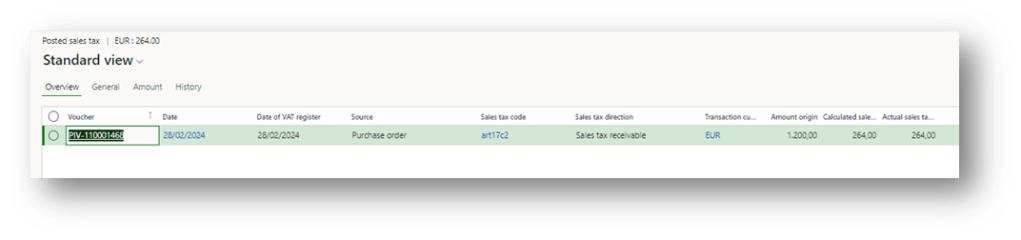
At the end, if we see the tax registration, we can see that the VAT outgoing was been posted:

Leave a comment