
Budget planning configuration – Scenario & Layout
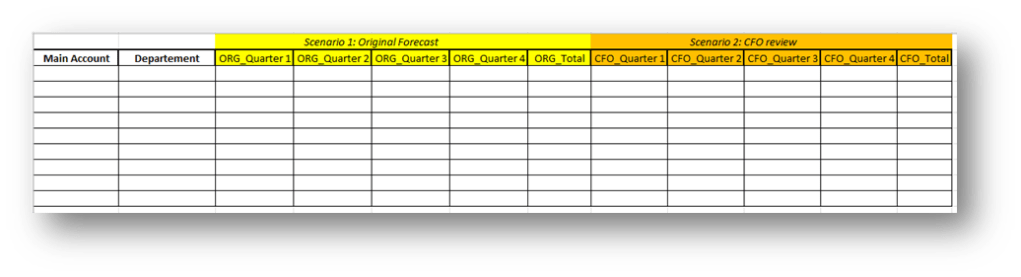
You need to understand the layout to understand the scenario correctly. What is the scenario for D365FO? It’s a group of columns on our layout. For a better understanding, we can see an example below:
- Main account + Department: Columns with the general entry value to insert for our budget planning;
- Scenario 1 – Original forecast: The collection of the columns from ORG_Quarter to ORG_Quarter_Total. The department will use it to insert the original budget amount value based on their forecasts.
- Scenario 2 – CFO review: The collection of the columns from CFO_Quarter 1 to CFO_Quarter_Total. It will be used by the CFO to insert the amount reviewed and agree with the different departments.
Furthermore, the form layout can be personalized by the approbator department. Imagine we want to apply two different layouts:
- Department layout: We will see only the “Scenario 1 – Original forecast” columns
- CFO layout: We will see the “Scenario 1 – Original forecast” + “Scenario 2 – CFO review” columns. But we can edit only the columns of the second scenario;
When we have defined our layouts, we need to assign them thoughts the budget tree structure:
- Budget Master: Finance department = CFO layout
- Sub-budget: Sales & Marketing = Department layout
- Sub-budget: Operation = Department layout
- Sub-budget: IT department = Department layout
- Sub-budget: Human Resources = Department layout
- Sub-budget: Legal = Department layout
- Sub-budget: Client Services = Department layout
We invite you to read the article Budgeting Planning – Architectural Design Notions for more details about the overall design process.
Scenario
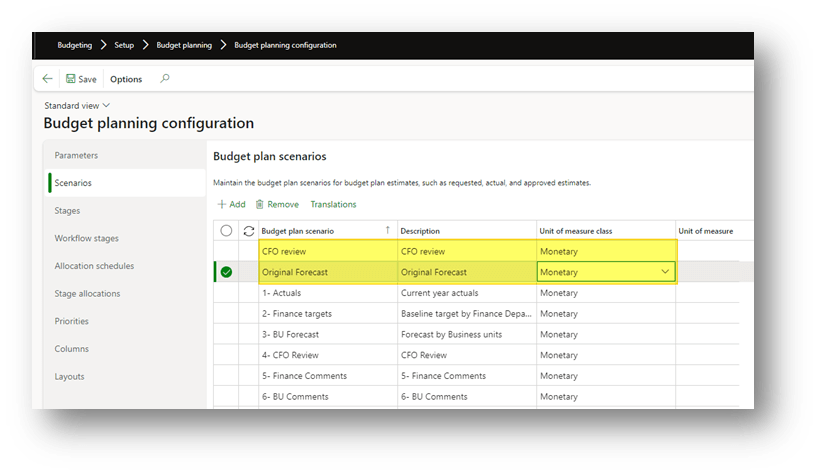
Go to: Budgeting> Setup> Budget planning> Budget planning configuration.
Create the scenario to collect the budget columns and indicate the unit of measure (usually, it’s monetary because we insert the amount’s value):
Columns
Go to: Budgeting> Setup> Budget planning> Budget planning configuration.
Create all the columns. For each of them, insert these data:
- Scenario: the scenario how collects the columns
- Name: Name of the columns
- Columns time period: the time reference
- Time reference: if it’s needed, insert the reference time of our column
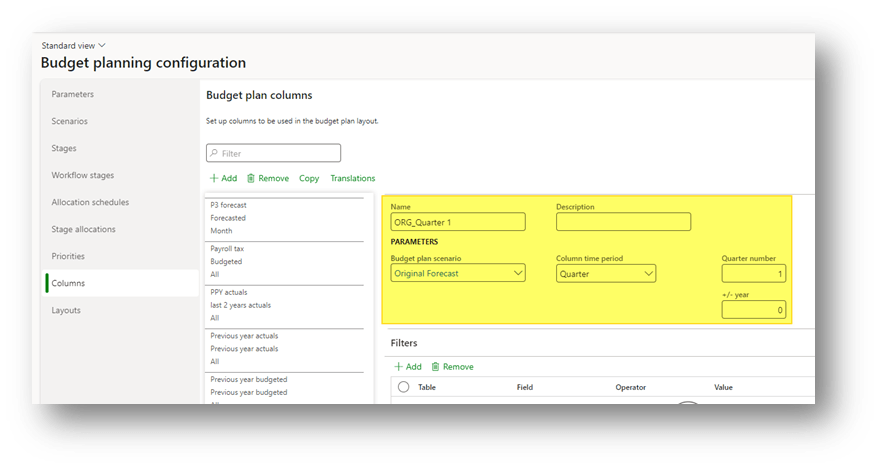
Here is a table with the columns created for my example. Eventually, we can add an advanced filter to recover the data from a specific source (like a precise project number).
| Budget plan scenario | Name | Column time period | Quarter number |
| Original Forecast | ORG_Quarter 1 | Quarter | 1 |
| Original Forecast | ORG_Quarter 2 | Quarter | 2 |
| Original Forecast | ORG_Quarter 3 | Quarter | 3 |
| Original Forecast | ORG_Quarter 4 | Quarter | 4 |
| Original Forecast | ORG_Total | All | |
| CFO review | CFO_Quarter 1 | Quarter | 1 |
| CFO review | CFO_Quarter 2 | Quarter | 2 |
| CFO review | CFO_Quarter 3 | Quarter | 3 |
| CFO review | CFO_Quarter 4 | Quarter | 4 |
| CFO review | CFO_Total | All |
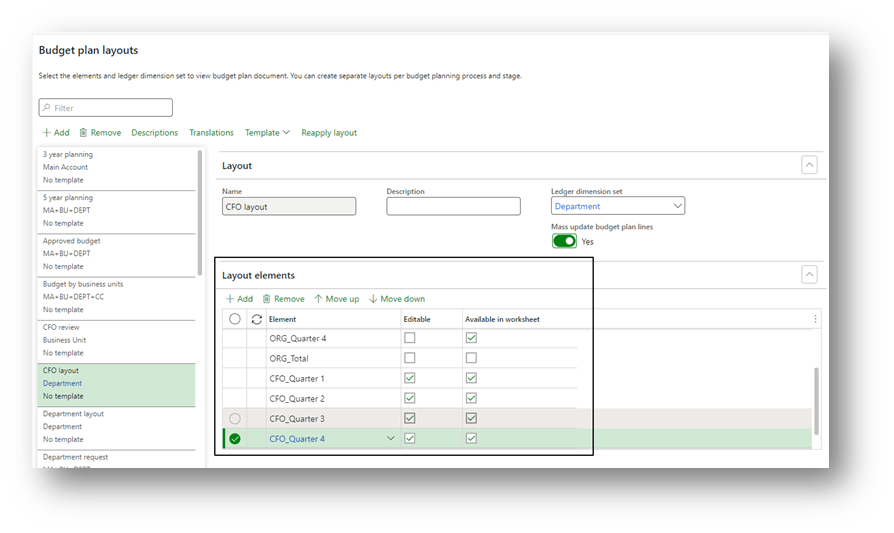
Layout
Go to: Budgeting> Setup> Budget planning> Budget planning configuration.
Here, we can create our forms layout. Insert in the header:
- Name: the layout identifier
- Ledger dimension: Insert at least a set with the main account + financial dimension involved in the budgeting hierarchy (for more details, we can see the article: Budget planning configuration – Organization).
- Mass update budget plan lines: flag it, if we want to allow massive update from excel
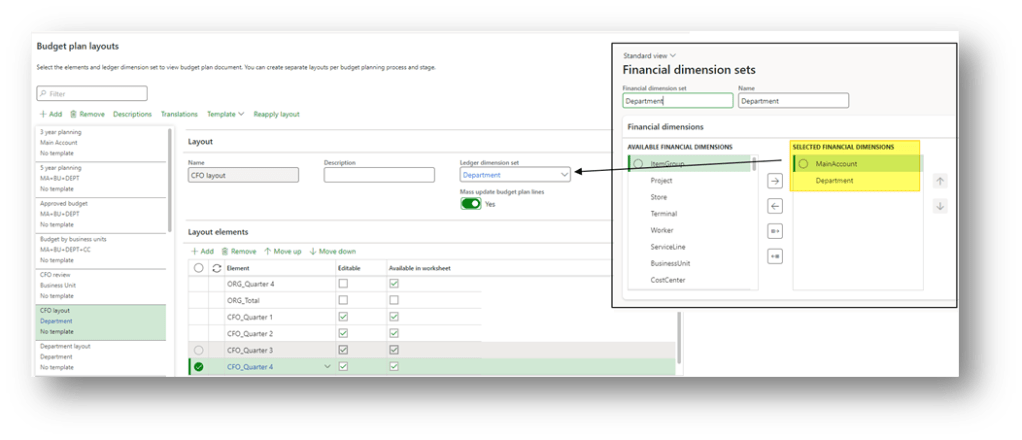
As lines, we insert our columns, moving the desired order (from left to right), choosing if they are editable and if we can see these columns in the excel file.
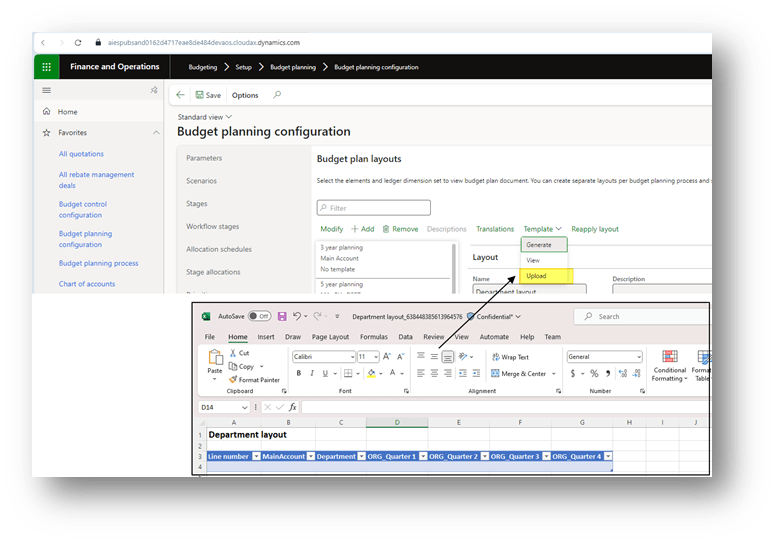
Excel layout
Select “Generate” to create the file for the first time. Then we can press “view” to download the layout template.
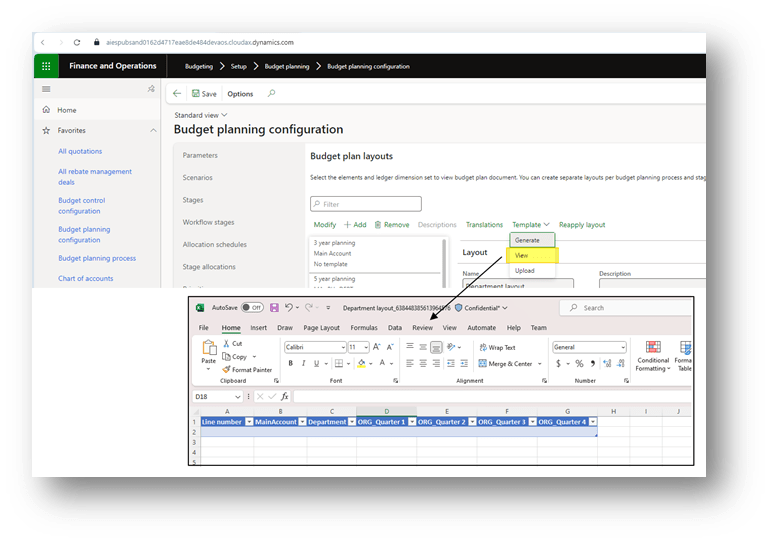
If we want, we change directly the layout excel template. When we finish our modification, it’s possible to import and update the new version of the template.
The excel file can also used to create an advance simulation forecast calculation. For more details you can see this article: link

Leave a comment