
Business process
D365FO proposes an out-of-box solution to manage the vendor prepayment.
Insert prepayment information
Go to: Accounts Payable> Purchase orders> All purchase orders.
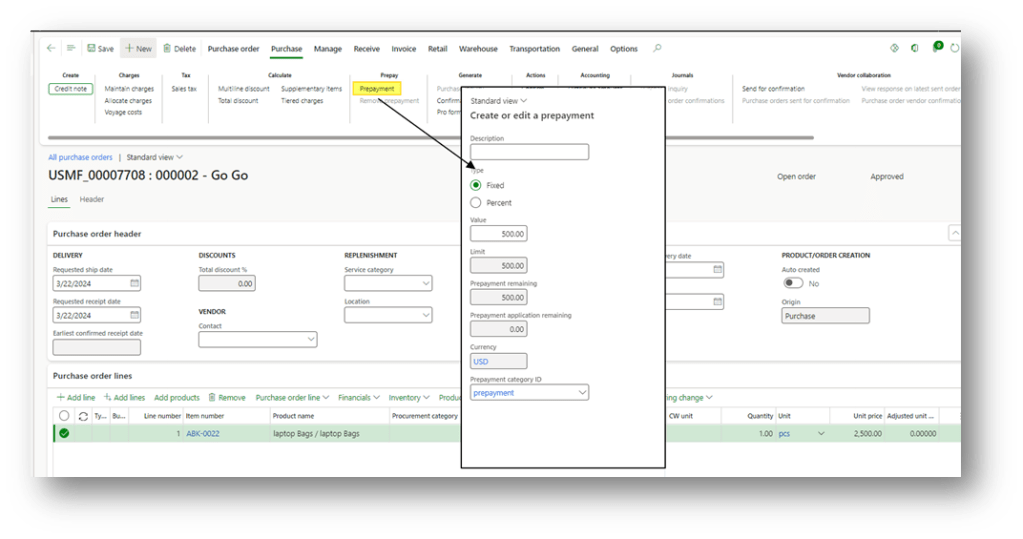
Create the purchase order as usual. Then, on the Action Pane, select the Purchase tab and click Prepayment.
In the Prepayment dialog, the prepayment amount can be specified as a fixed amount or as a percentage of the total purchase order value.
Prepayment dashboard
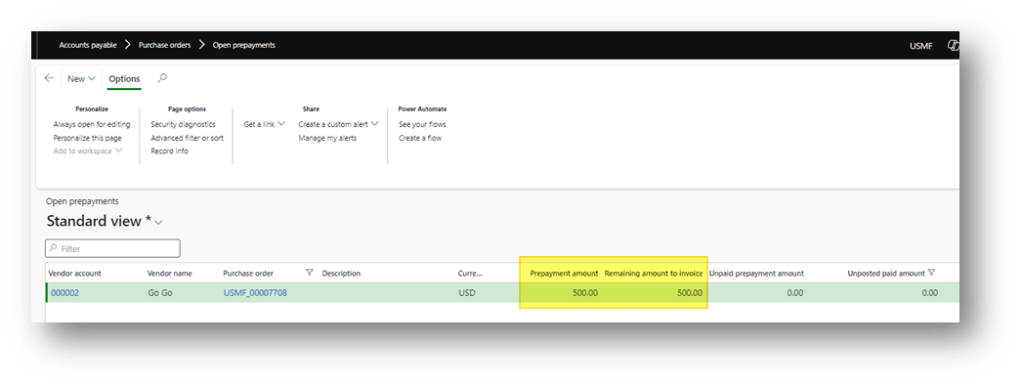
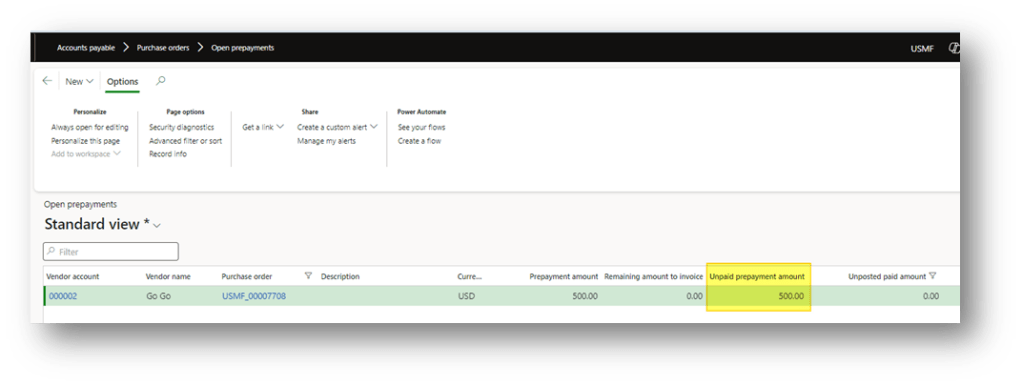
Go to Accounts Payable> Purchase orders> Open prepayments.
You can track the allocated prepayment amounts using thi form.
- Prepayment amount: The total prepayment amount allocated on the purchase order.
- Remaining amount to invoice: The prepayment amount that still needs to be invoiced
Prepayment invoice
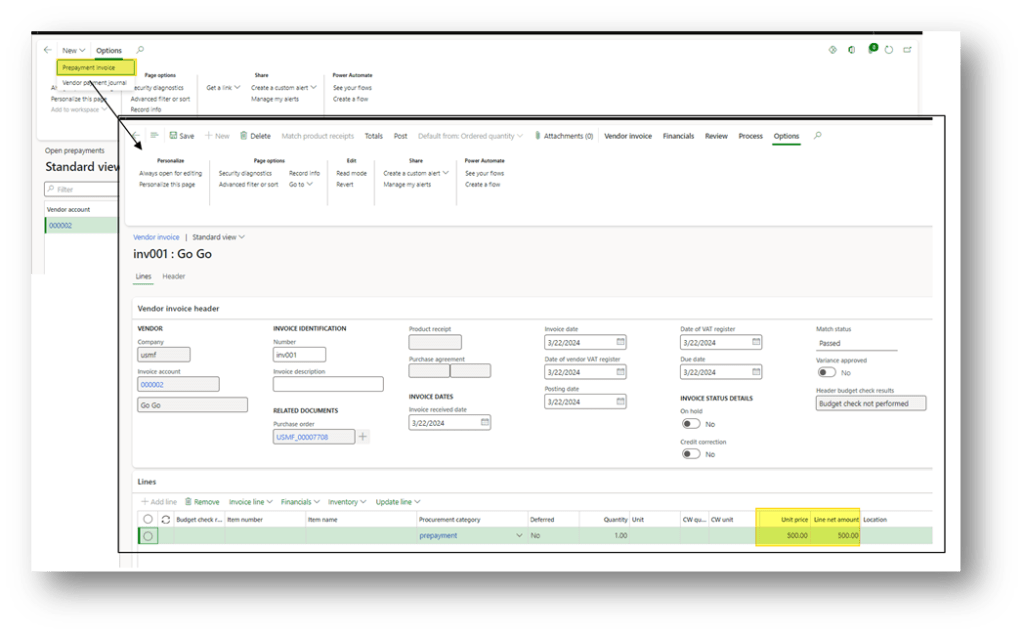
Go to: Accounts payable> Purchase orders> Open prepayments.
Select the purchase order and click in “Prepayment invoice”. D365FO proposes a vendor invoice with the prepayment amount definied eirler. Then post it using the standard vendor invoice posting process.
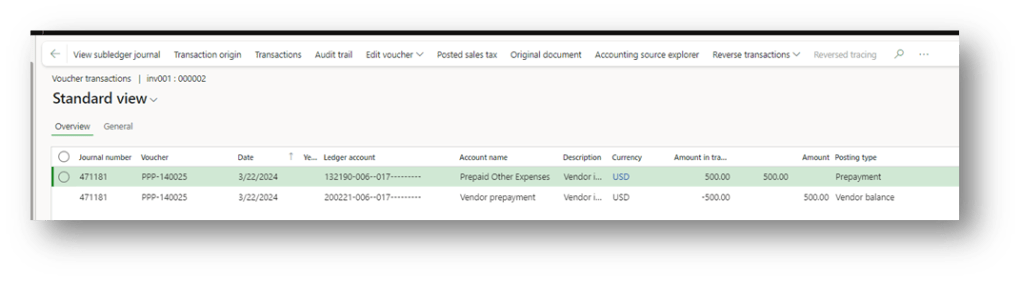
Note that when posting the prepayment invoice, D365FO automatically uses a dedicated posting profile (configured in Accounts payable parameters) to post the liability to the vendor’s summary account (Accounts payable) and the offsetting entry to a balance sheet prepayment asset account:
Returning to the Open prepayments form, you can now see that the prepayment amount has moved to the Unpaid prepayment amount field (after posting the prepayment invoice). This represents the invoiced prepayment amount that remains to be paid to the vendor.
The invoicing will use specific main account for the B&L accounts:
Payment journal
Go to: Accounts payable> Purchase orders> Open prepayments.
Select the purchase order and click in “Prepayment jounral”.
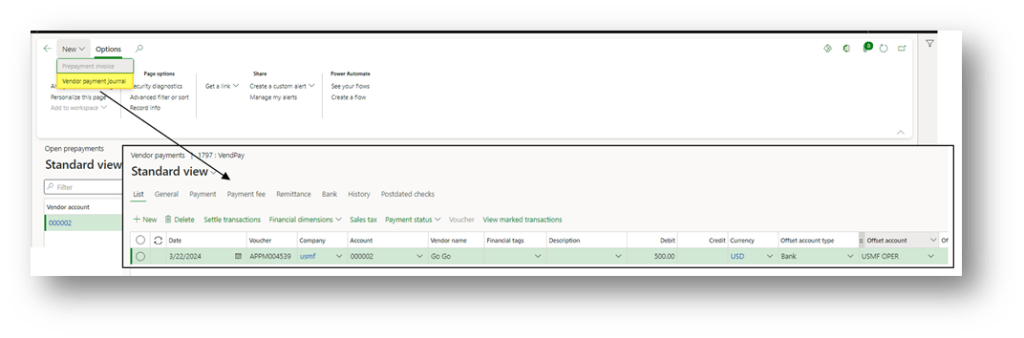
Create a vendor payment journal and post it, as usual. The system processes to record the payment voucher and automatic write-off the correct payment main account:

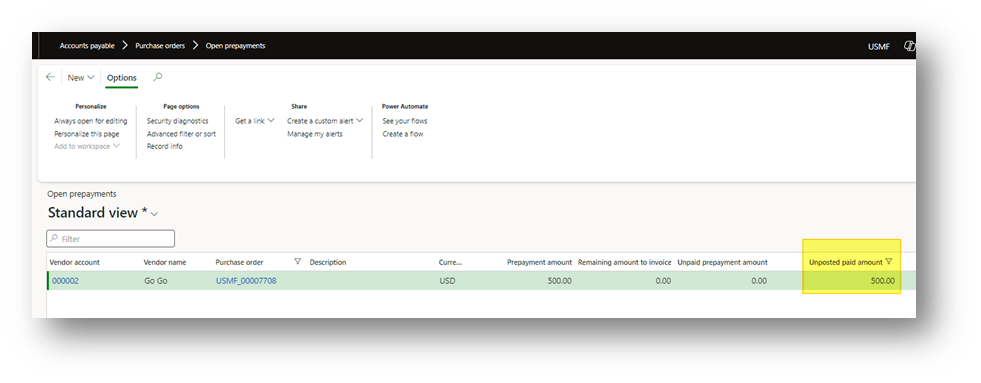
After posting the payment for the prepayment invoice, return to the Open prepayments form. You will see that the amount has moved to the Unposted paid amount field.
This indicates that the prepayment has been paid to the vendor, but it has not yet been applied (or used) on the final vendor invoice.
Vendor invoice
Finally, return to the purchase order and generate the regular vendor invoice (via the Invoice tab > Generate > Invoice, or from pending vendor invoices).
Before posting, on the Action Pane, go to the Invoice tab and click Apply prepayment. Select the prepayment to apply.
If needed, adjust the amount to apply (partial application is allowed), and the remaining prepaid amount can be used on another purchase order or invoice.
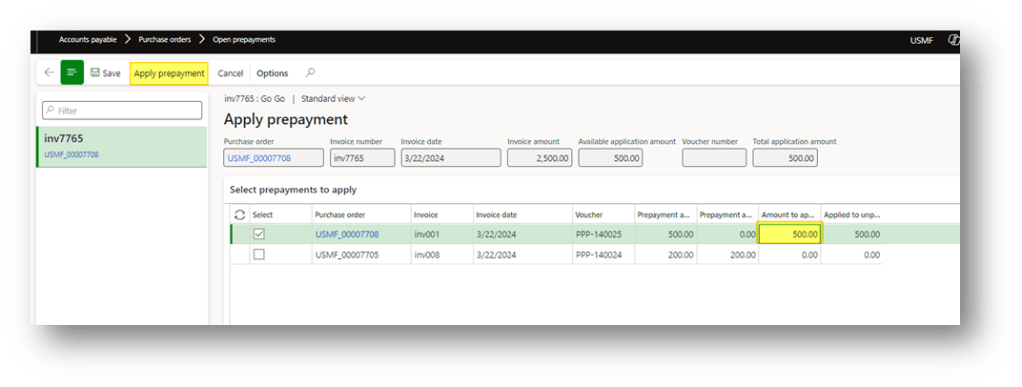
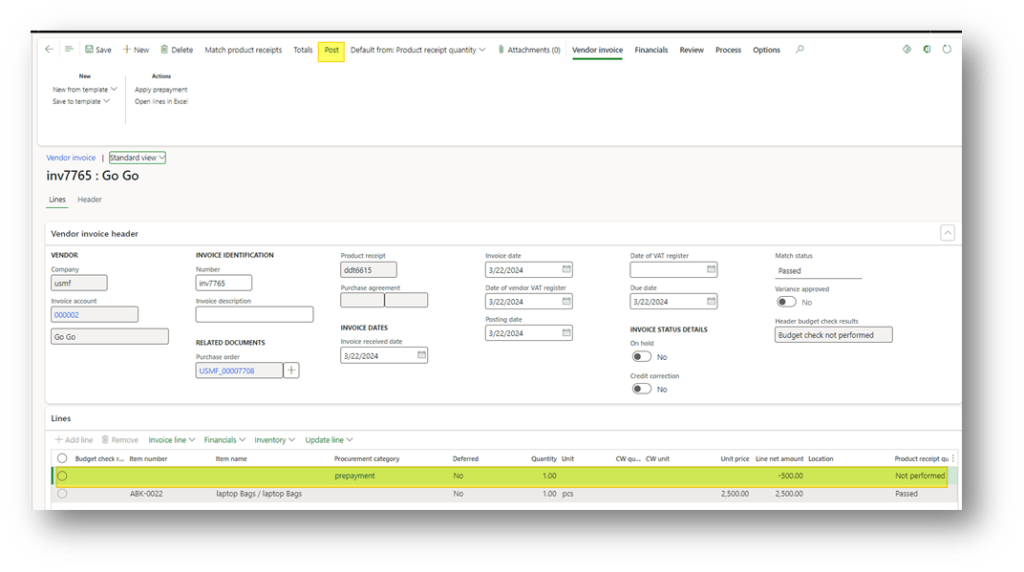
After applying the prepayment, D365FO automatically adds a negative line (using the prepayment procurement category) to the vendor invoice, reducing the net invoice total by the applied prepayment amount.
You can now review the updated totals and post the invoice to complete the process.
Important: Never manually edit or delete the prepayment line directly. If modifications are needed (e.g., partial application, adjustments, or unapplying), always use the Apply prepayment function to handle changes properly.
Here you can see the voucher resulting from the posting:

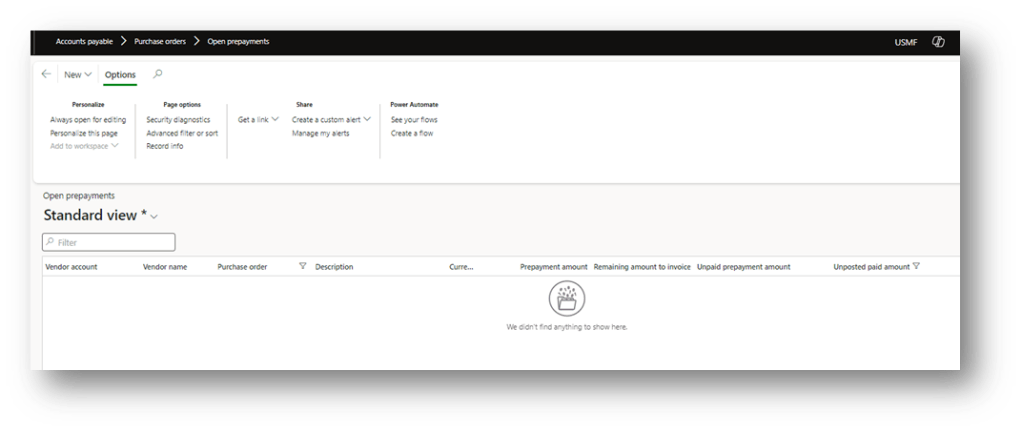
When we finish using the prepayment, we can see that the open prepayment amount disappears from the monitoring form:
Configuration
Accounts payable parameters
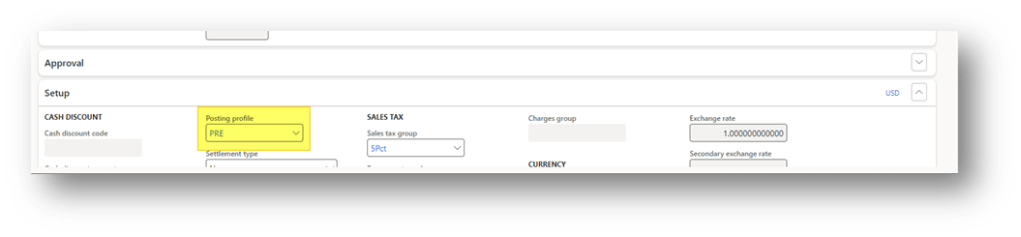
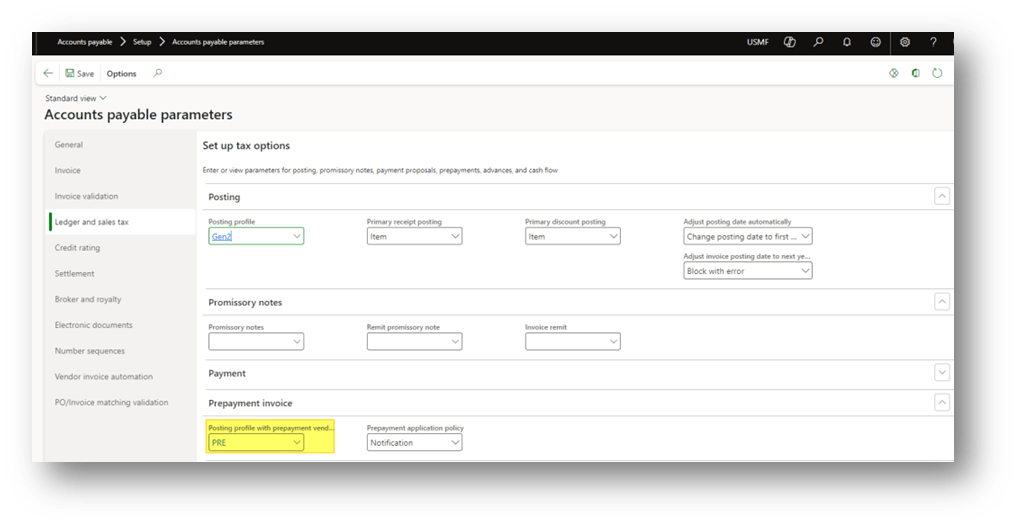
Go to: Accounts payable> Setup> Accounts payable parameters
Select here the posting profile to use to associate the vendor prepayment posting:
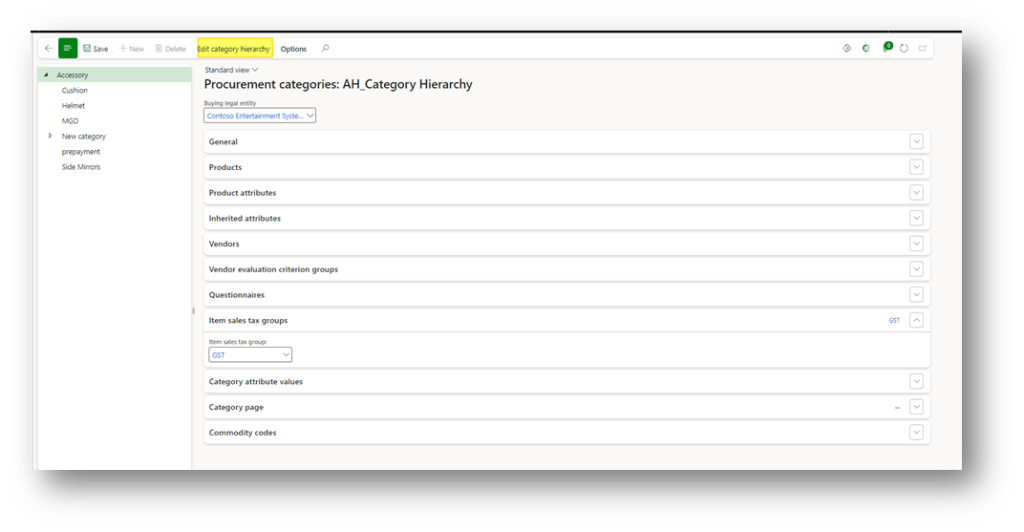
Purchase categories
Go to: Procurement and sourcing> Procurement categories.
Click in “Edit category hierarchy” and create a new category dedicate of prepayment (follow these indications to insert the tax data: https://wordpress.com/post/daxmsdynamics365.wordpress.com/1512)
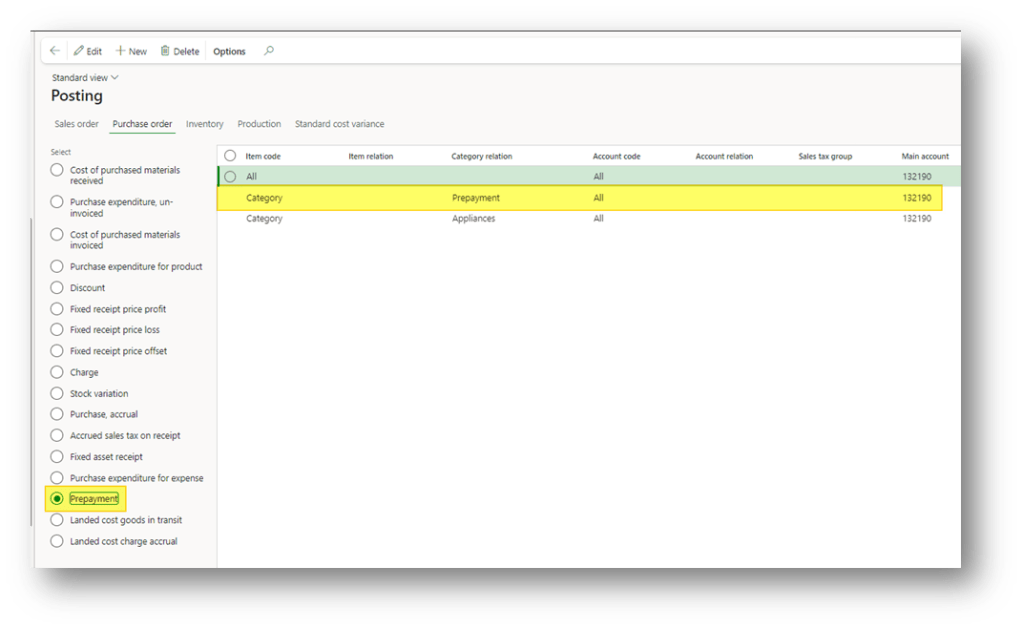
Inventory posting
Go to: Inventory management> Setup> Posting> Posting.
In the tab prepayment the prepayment account tied to this category:

Leave a comment