
This article presents the invoice capture to the operational user. The invoice capture is a solution that has a role in reading the vendor invoice massively and writing it in D365FO. It’s a semi-automatic procedure, and the intent is to give the user support to leverage a higher number of invoices and make the work easier. The IA reads the invoice, and then the user will do the final review.
During the article, we will see:
- Received files: Check the list of invoices received from the different channels;
- Captured invoice: The result of the IA reading of the invoice, and we can decide if to go forward with a review;
- Dashboard: Resume of the situation;
Received files
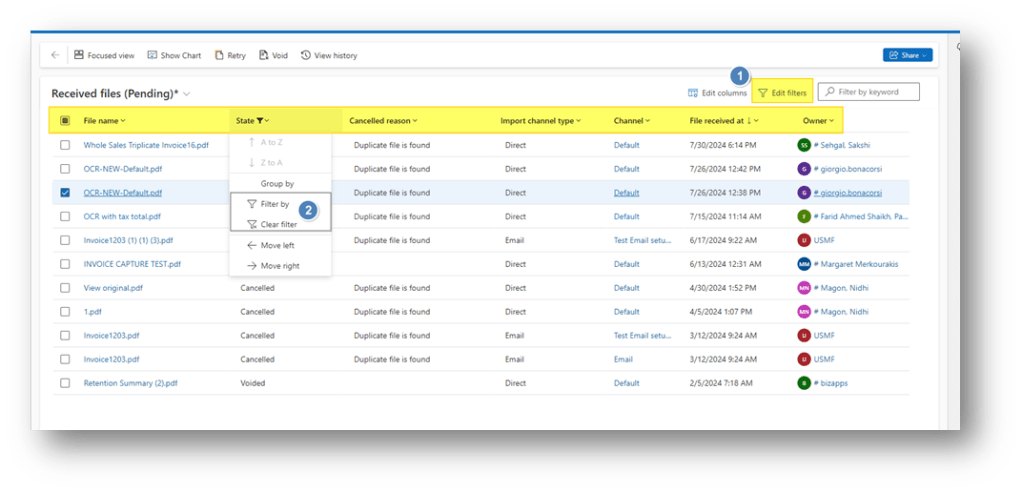
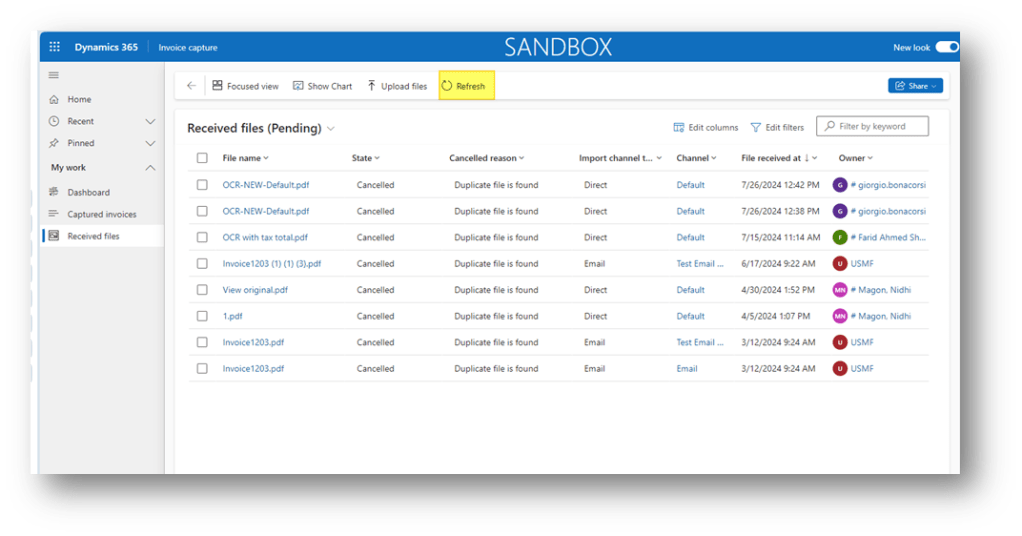
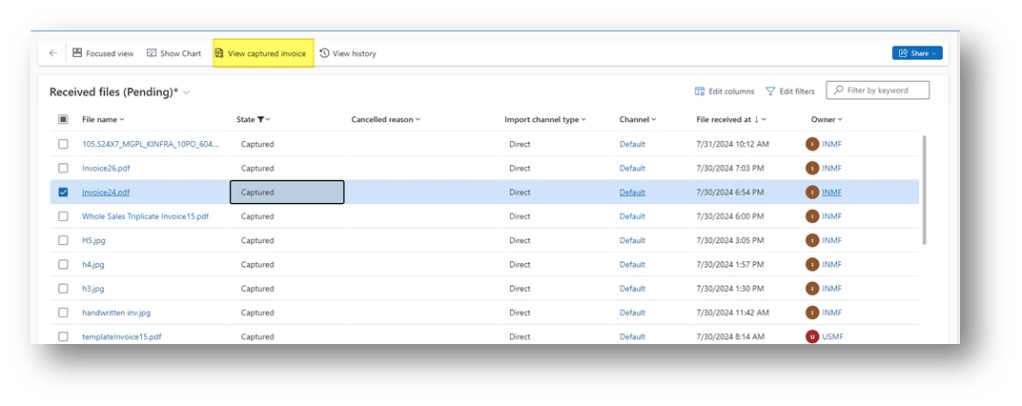
Go to: Manage> Received files.
We can see the list of documents received from the different channels in this dashboard. The invoice can assume these statuses:
- Waiting: wait to be read by the AI model;
- Processing: reading in progress;
- Captured: reading terminated;
- Cancelled: reading fail;
- Rejected: the invoice is obsolete;
- Time-out: the AI model didn’t answer;
The options that we have here are:
- Filter: filter the value. Notice that as default, the form is filtered to show only the invoice different from “Captured” and “Rejected”;
- Refresh: refresh the data present in the form;
- View captured invoice: For the record with the status “Captured, we can see the result.
- Retry: If an invoice has the status “cancelled” or “time-out”, we can ask to re-process the invoice. This option allows the multiple selection:
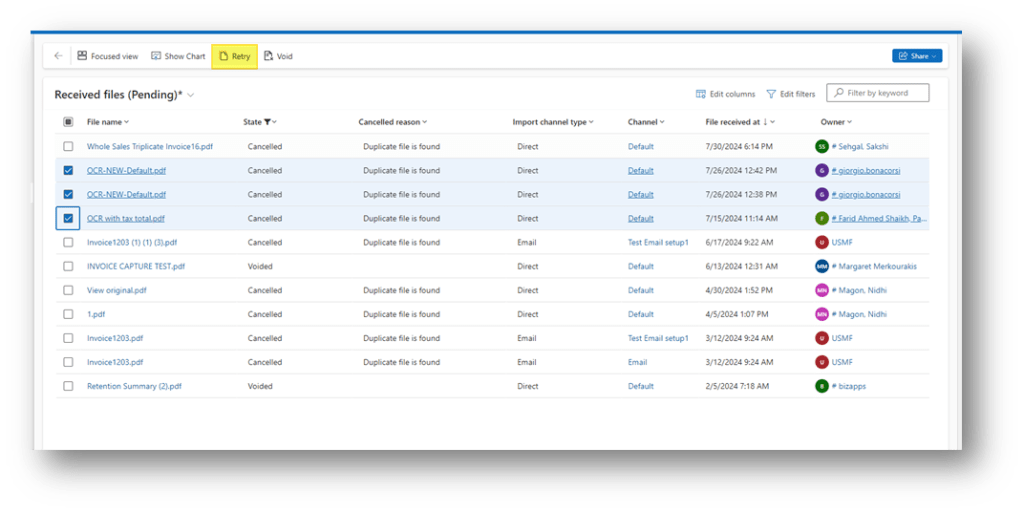
- Void: for the invoice with a status different from “Captured”, we can void the invoice. This option allows the multiple selection:
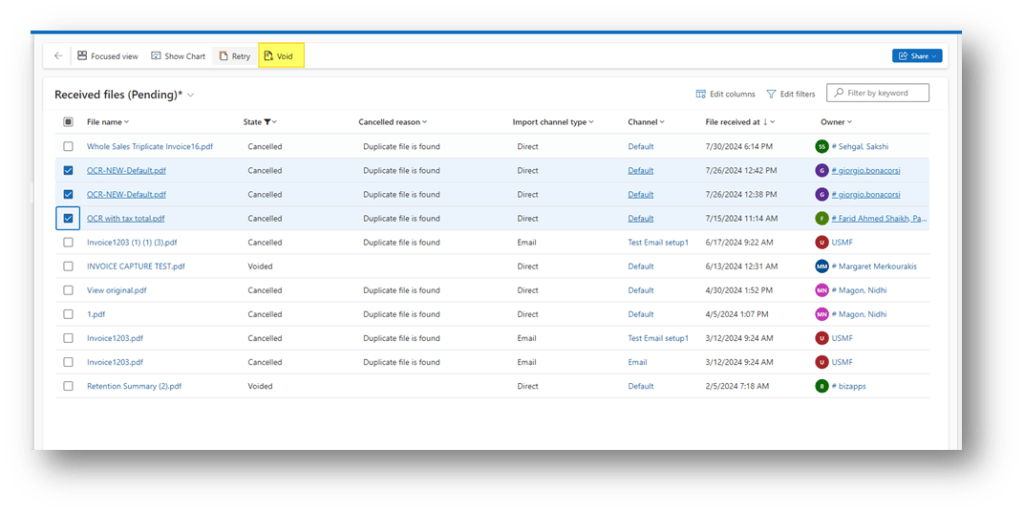
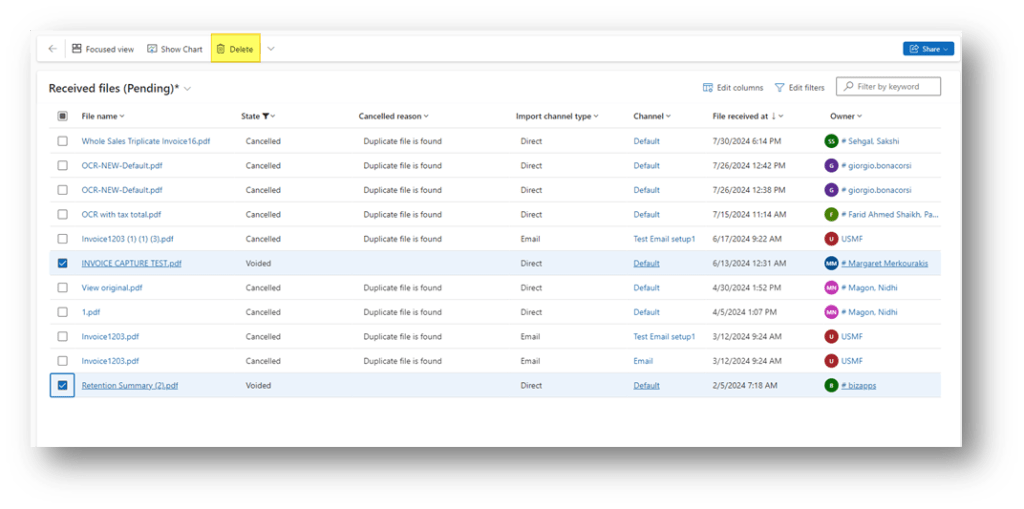
- Delete: for the voided invoice, we can delete the record. This option allows the multiple selection:
- View history: we can see the history of the elaboration (useful in case of cancellation);

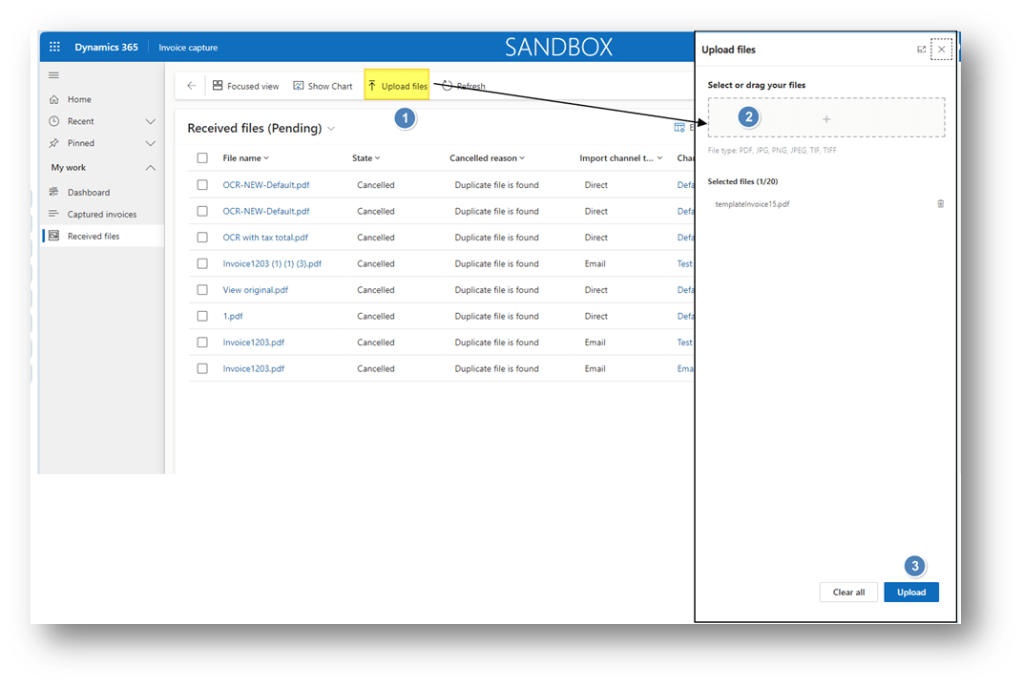
Another interesting information is that we can also import an invoice manually. That can be considered a practical way to follow if, for some urgent reading, we need to read an invoice immediately:
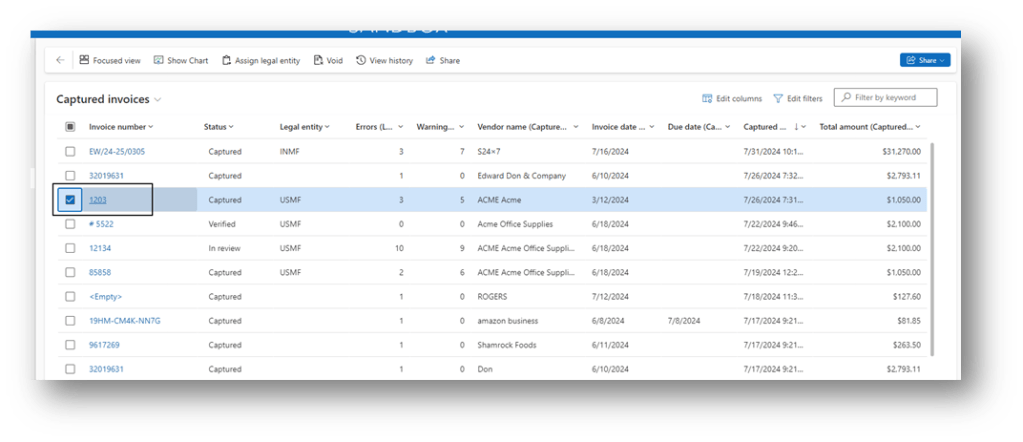
Captured invoice
Go to: Manage> Captured invoices.
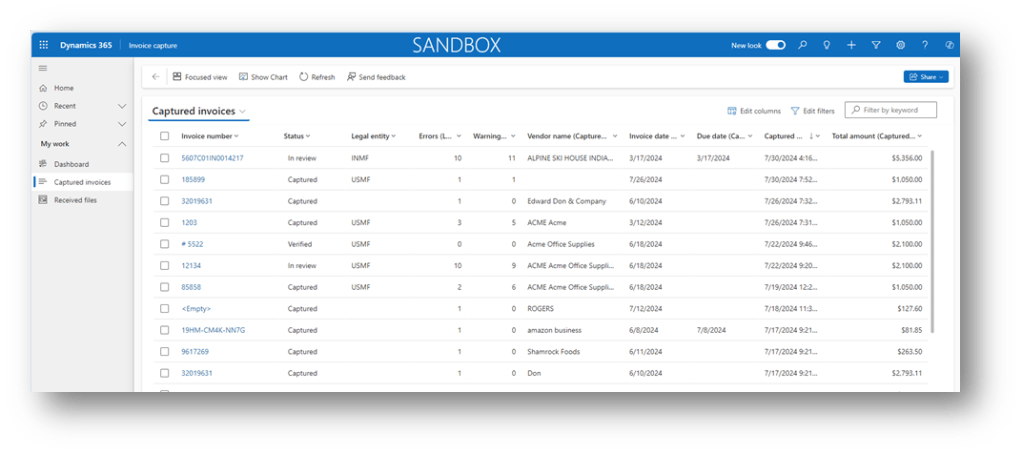
Here, we can see the list of the invoices elaborated by the AI model and an overview of the result. The status means:
- In progress: AI model is reading the invoice file;
- Captured: AI model finish to read the file;
- In review: the invoice document is in review from the user
- Verified: the invoice was verified by the user
- Transferred: The invoice was transferred to D365FO
- Voided: The document is obsoleted;
Form structure
We will present the structure of the form, as instructed, before discussing our options. Select the invoice to check with the status “Captured”, and click on the invoice number:
The form is divided into these boxes:
- Overview: we can see the invoice layout;
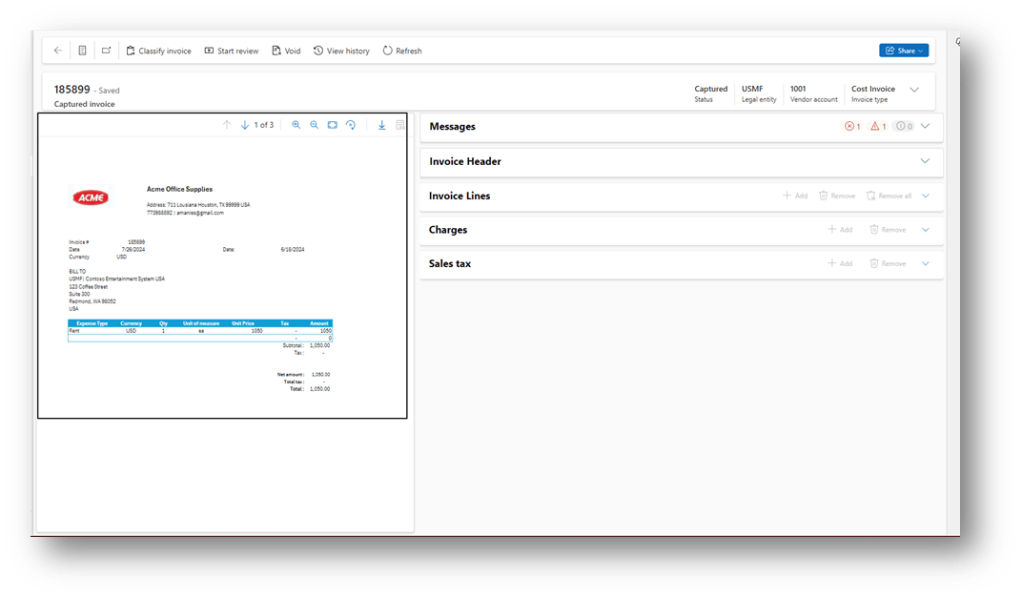
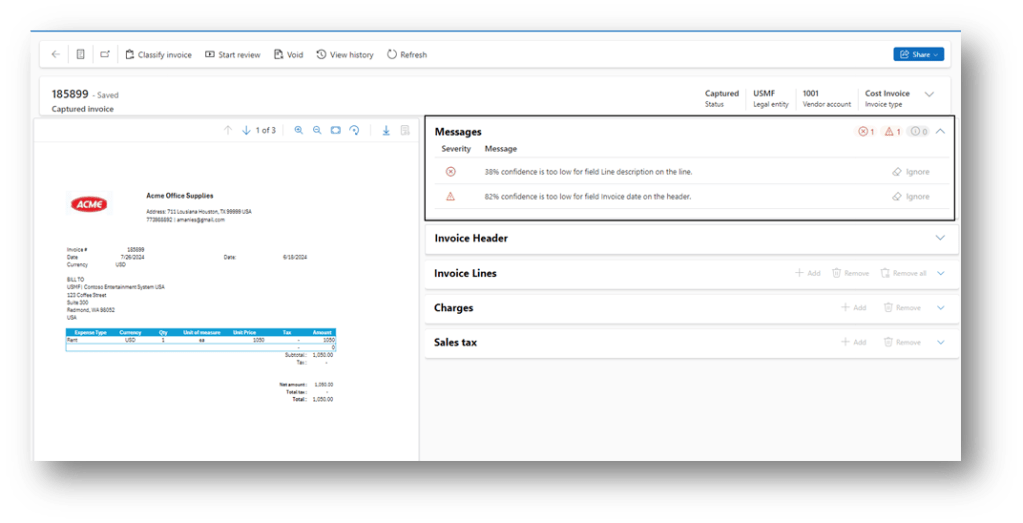
- Messages: Here there are the wanted or error messages. Note that the classifications are based on the confidence score setup on the configuration group (for more details, we can see this article: https://daxmsdynamics365.wordpress.com/2024/07/29/manage-configuration-group/ ):
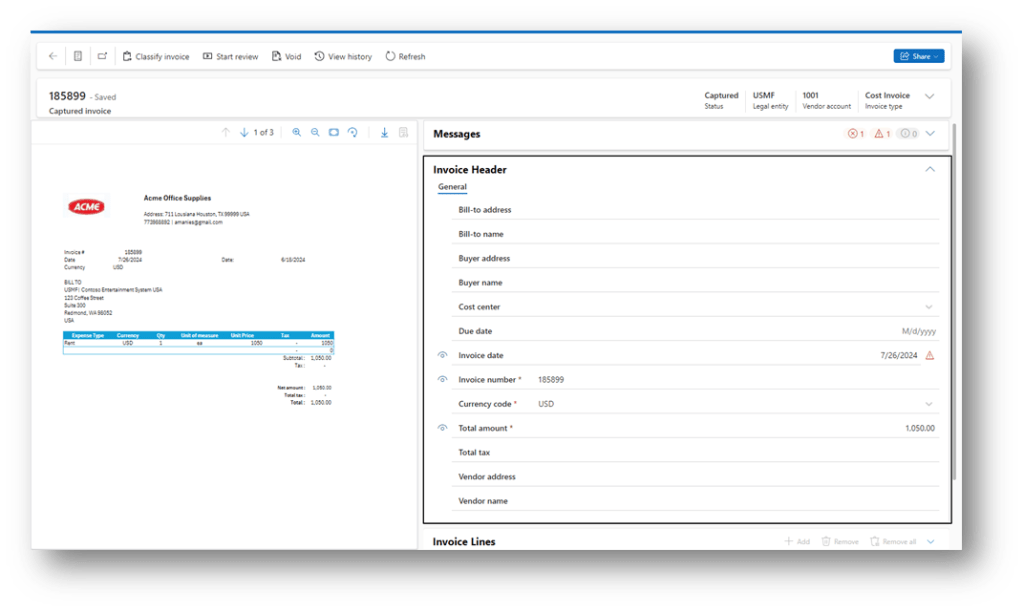
- Invoice Header: We found the header data read by the AI model:
- Invoice Lines: We found the header data read by the AI model:
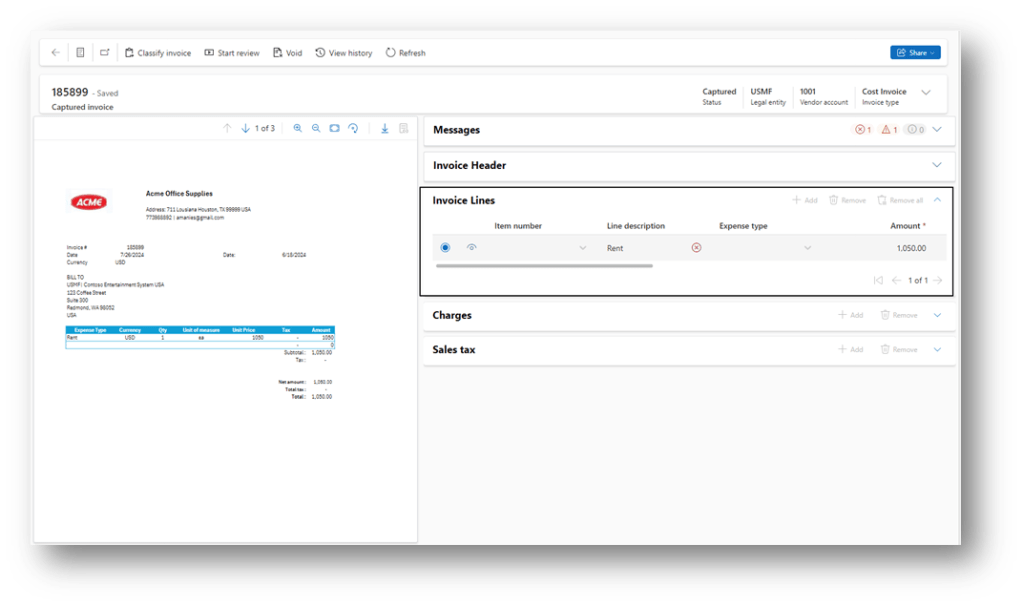
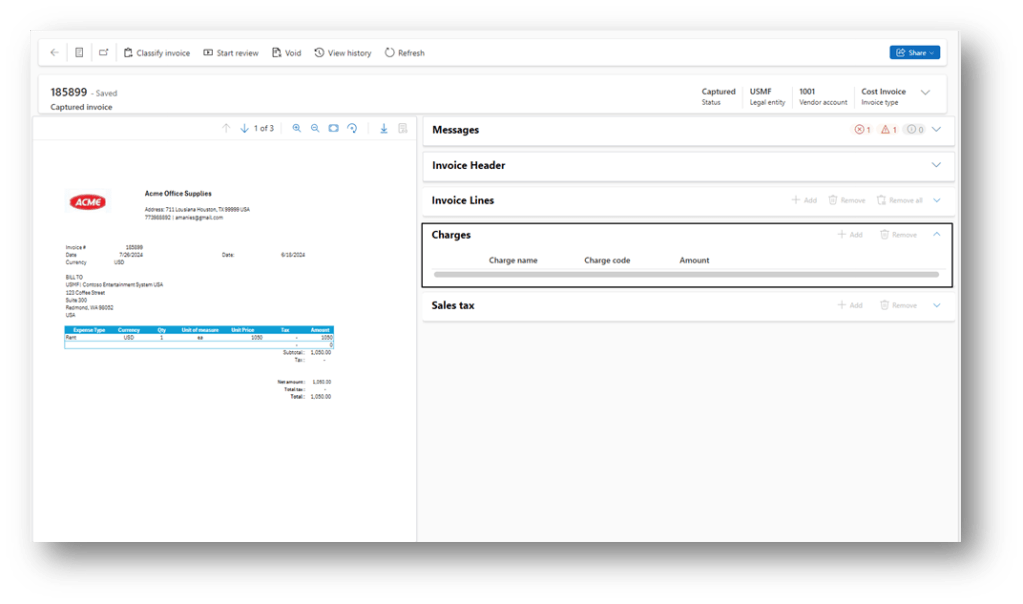
- Charges: This contains the charge details:
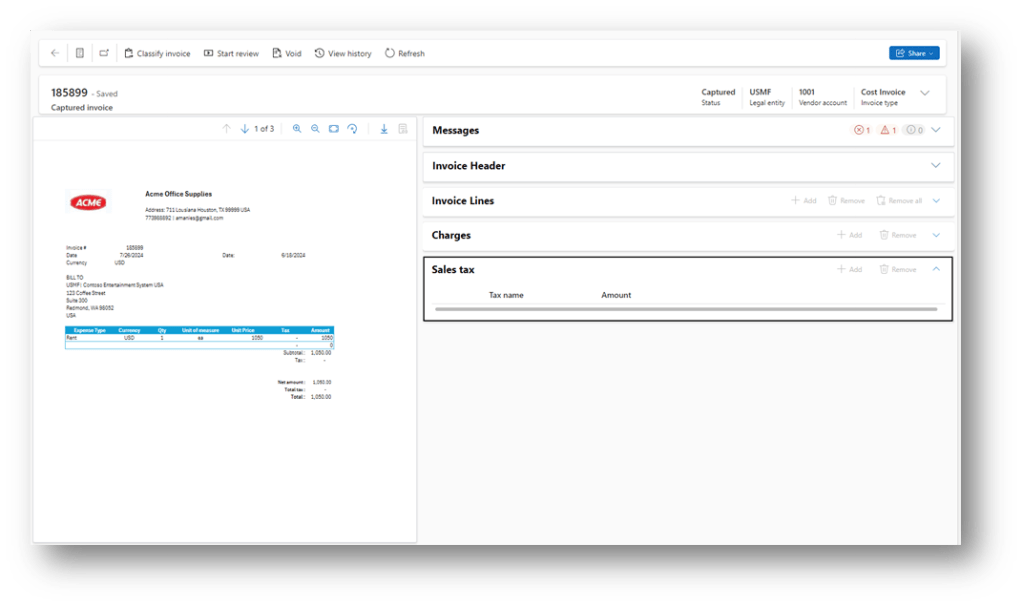
- Sales tax: This contains the sales tax:
Invoice capture options
Now, we present the options that we have in sequential logic (from the first to the last task):
Classification invoice
The classification decides which kind of document we will post (pending invoice or vendor invoice journal), in which legal entity and vendor account. About the last two elements (legal entity and vendor), the invoice capture does a pre-classification based on the configuration mapping (for more information, we can read this article: https://daxmsdynamics365.wordpress.com/2024/07/26/invoice-capture-configuration-mapping-rules/ ).
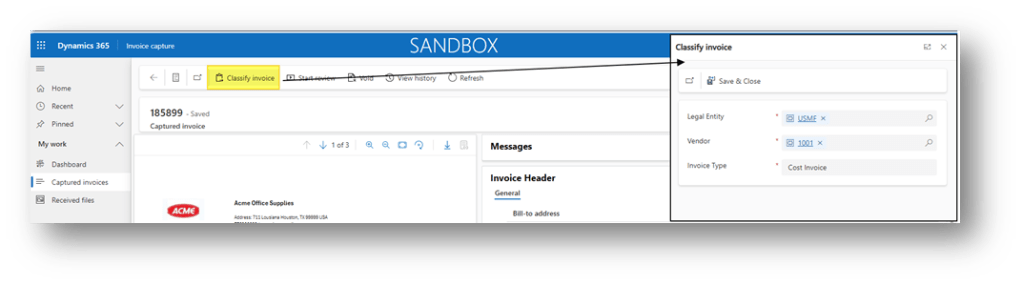
However, we can check and decide to change it. Click on “Classify invoice” and check these elements:
- Legal entity;
- Vendor;
- Invoice type: choose the document that we will post in D365Fo:
- PO Invoice: Post invoice like pending invoice;
- Header only: Post invoice like pending invoice, but just the header
- Cost invoice: Post invoice like vendor invoice journal;
If the system does find a PO, it’s automatically classified as a “Cost Invoice.” Otherwise, it’s classified as a PO Invoice or Header only based on the data that the AI modal was able to read.
Start review
This activity can be done only after the classification. It’s important to do the classification properly before reviewing it because, after that, we cannot go back to it.
We can also modify the value present in the invoice. Notice, for some fields like expense type (it’s the procurement category for D365FO), the list of the values proposed comes directly from D365FO:
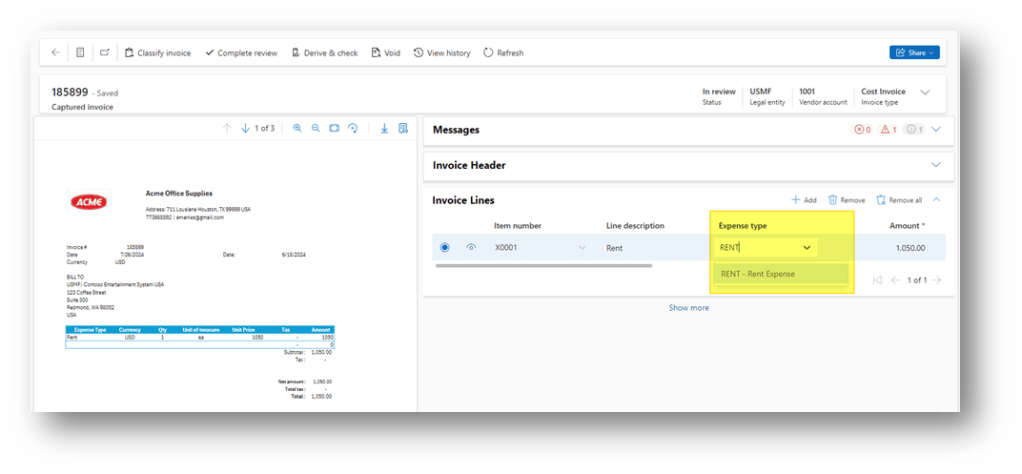
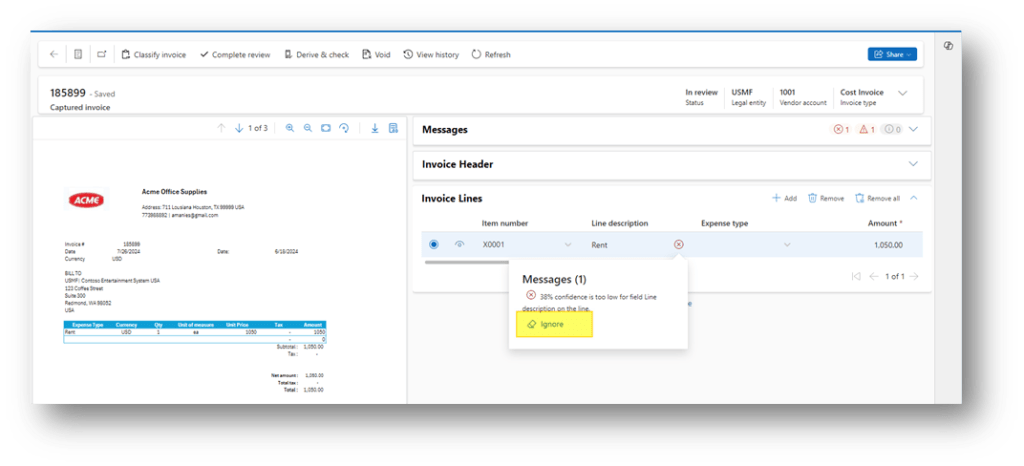
When we click on “Start review”, and it can now modify the invoice data. We can check the message signalized by the IA model and click on it, and press “ignore” to remove the notification. Important, we suggest doing it after cleaning up the invoice data:
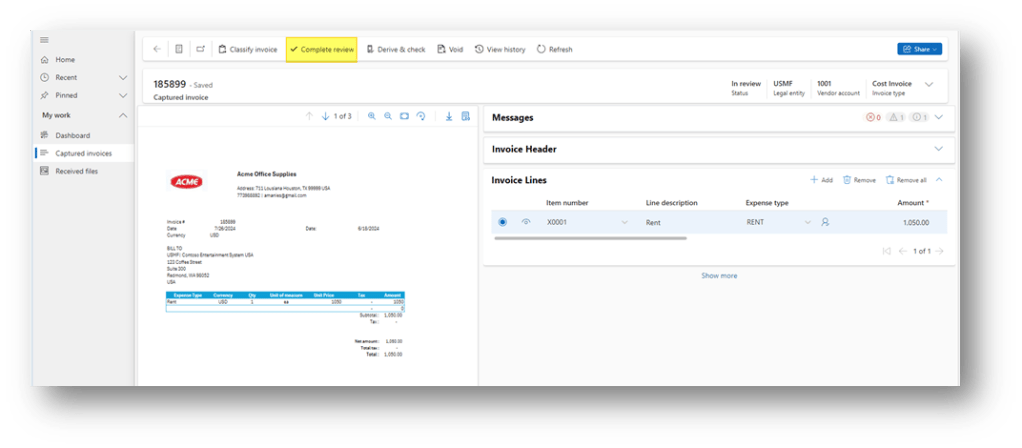
When we finish the review, we can press “Complete review.” Notice that we can restart a new review and complete it as many times as we want until we don’t transfer the invoice to D365FO.
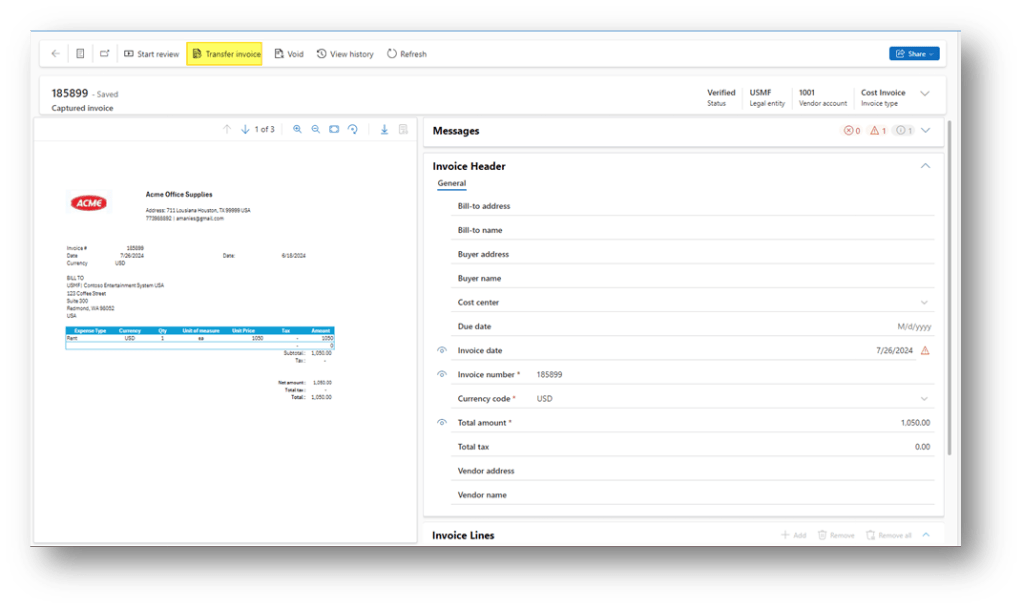
Transfer
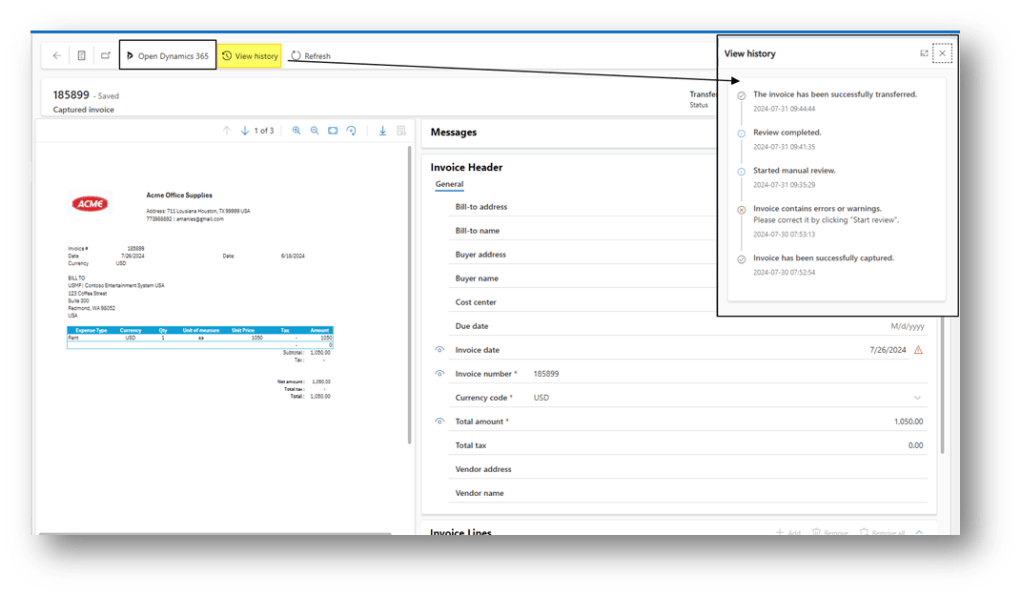
Finally, click in transfer to send the invoice in D365FO:
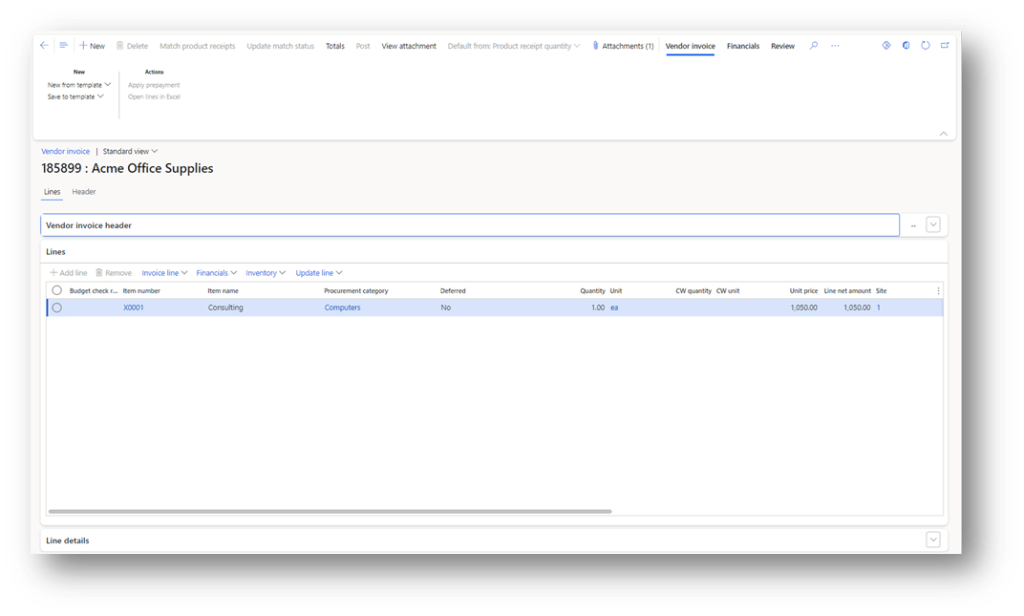
When the transfer is completed, we can see the history or/and jump in D365FO to see the result:
In D365FO, we can have the attachment (for more details about the setup, see the article: https://daxmsdynamics365.wordpress.com/2024/07/29/invoice-capture-enable-parameters-for-invoice-capture/ ). After the reception of the vendor invoice, we can proceed with the regular activities: workflow, matching, validation and post. The only difference is that the document was inserted and pre-matched by the invoice capture, rather than being inserted totally manually:
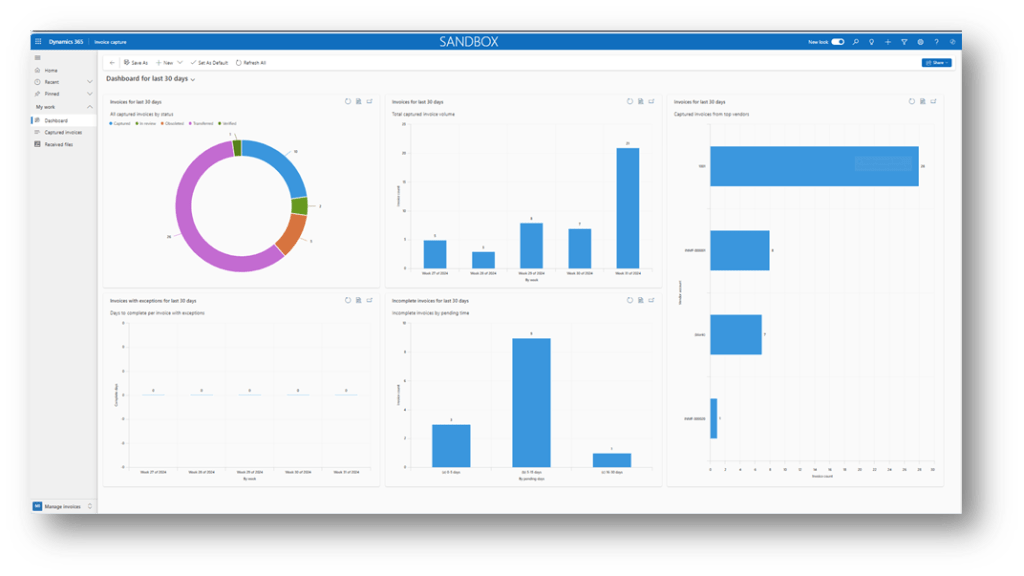
Dashboard
Go to: Manage> Dashboard
That’s the point of the situation for the invoice capture. We can select three filters:
- Dashboard for the last 30 days;
- Dashboard for the last 60 days;
- Dashboard for the last 90 days;
The information provided by the form in the period concerned are:
- The invoice captured status repartition;
- Volume captured invoice by day;
- Volume captured invoice by vendor
- Volume of invoice exception;
- Volume pending invoice
Note
We have seen the main process related to invoice capture, and now, we are going to go deep dive into some specific topics:
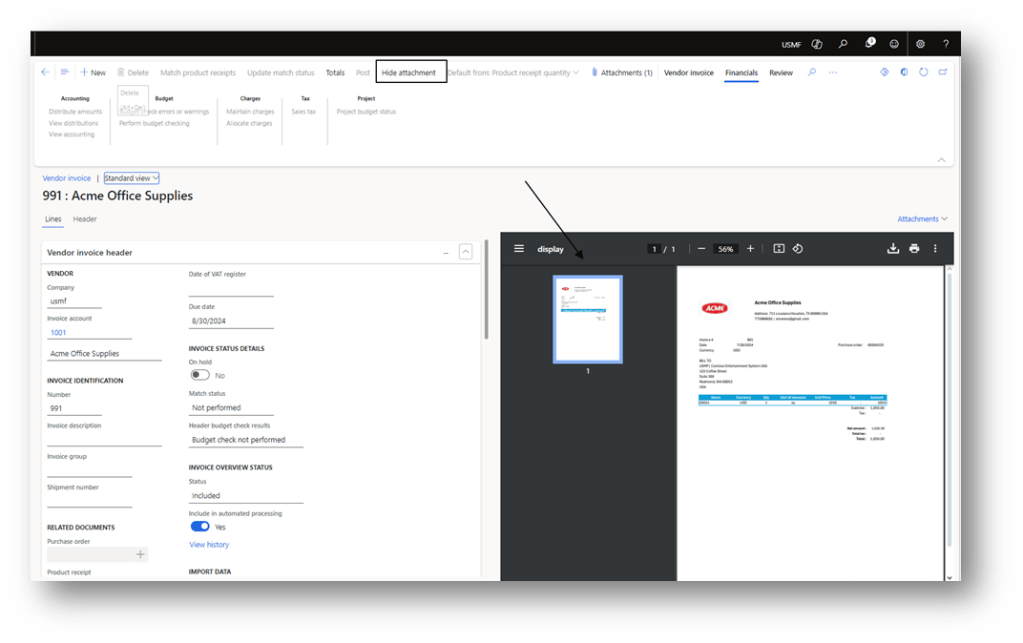
Attachment
From the pending invoice, we can see the attachment in the header:
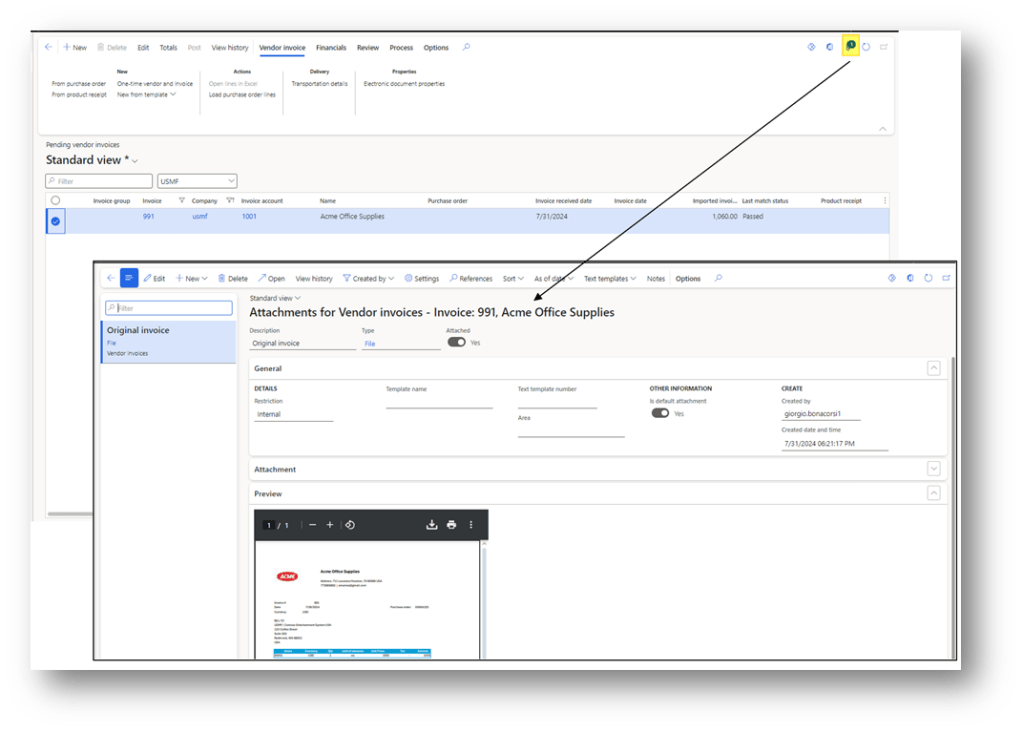
In the pending invoice, it’s possible to see the attachment document:
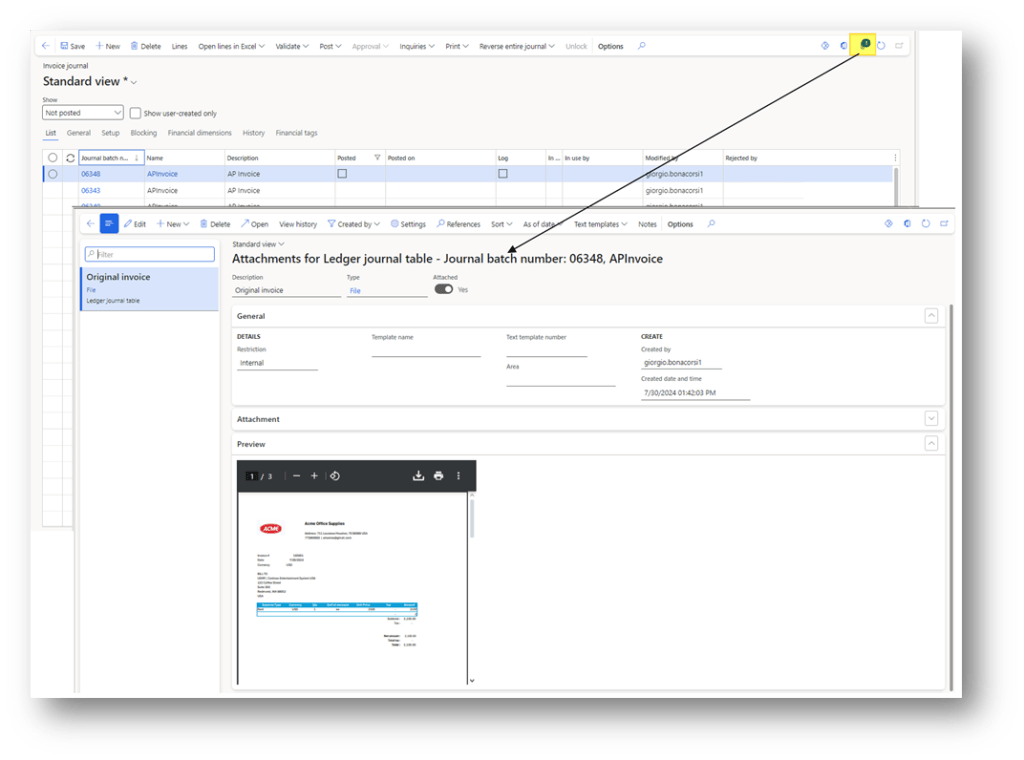
Moreover, in the vendor invoice journal, it is also possible to see the attachment from the header:
Mapping
The dates mapped between the invoice capture and D365 are:
- Legal entity;
- Vendor;
- Items
- Expense type (procurement category)
All the other values are copied and pasted directly into the invoice.
For more details about how to set the mapping, we can see this article: https://daxmsdynamics365.wordpress.com/2024/07/26/invoice-capture-configuration-mapping-rules/
Matching
The matching is based on the purchase order number; the “product receipt number” is not considered in the derivation of the matching. We can from the line decide to check and reorganize the matching (the information that we see are the purchase order lines, free to match):

Because the matching is based on the purchase order line, it’s better not to confuse the system that items in the PO are inserted on a single line (not multiple lines).
Charge code & Sales tax
The charge and the sales tax present invoice capture is used to check the total amount. However, it is not part of the transfer; we just transfer the total amount.
During the transfer, the pending invoice will inherit the charge, sales group and items sales tax group present in the purchase order line:
Vendor invoice journal – Offset main account
At the moment that I’m writing this article, the offset main account is not recovered from the inventory posting profile. It’s recovered from the detailed main account using the vendor master data, or vendor invoice journal offset configuration.
That can become a problem, if we don’t have a purchase order, and we have to manage the different services from the same invoice:
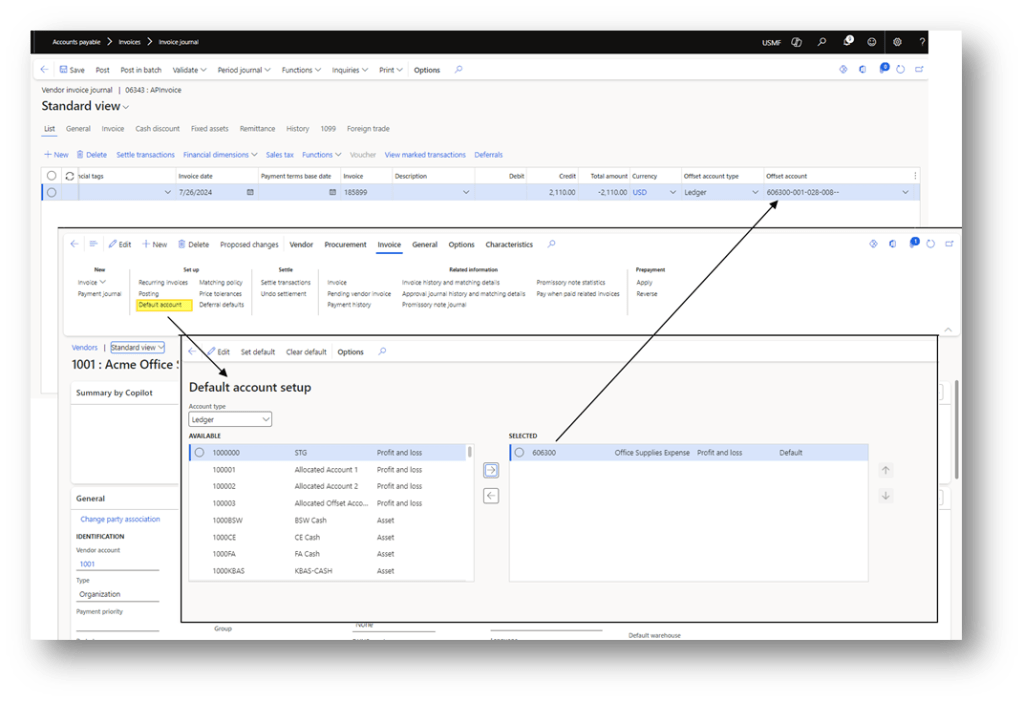
For this reason, we suggest posting the free text invoice using the pending invoice, too. It’s possible to drive the cost main account based on the items or procurement categories individuated by the invoice capture.

Leave a comment