
Solution D365FO
This solution is the most advanced tool available because it automatically generates the vendor payment proposal. However, like all automatic procedures, it requests that we feed it with precise data. It means that the configuration should be impeccable and the vendor master data as clean as possible because an imprecision can turn a single mistake into a missive mistake.
Activate feature
Go to: System administration> Workspaces> Feature management. You need to activate the feature “Vendor payment proposal automation”.

Configure the process automation
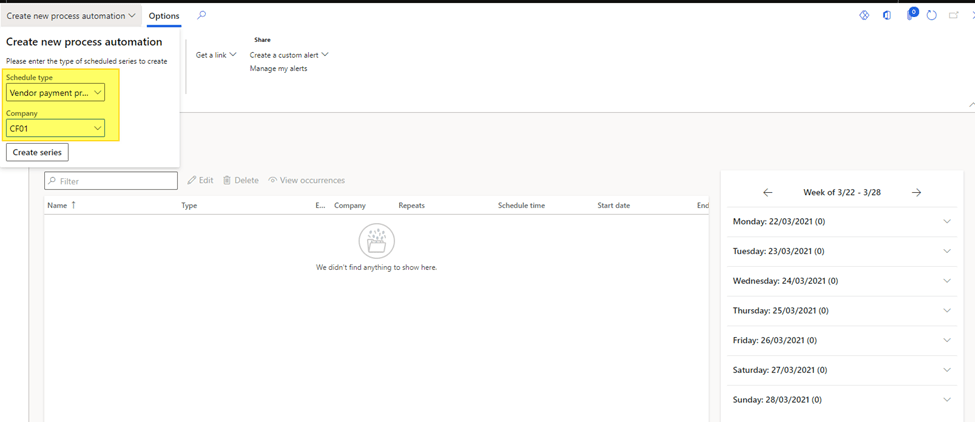
Go to: Accounts payable> Setup> Payment setup> Process automations. Follow these steps to set the automatic payment proposal:
- Create a schedule: Press “Create new process automation” to create a new process and select the company. D365FO run a wizard to help the user configure the recurrence:
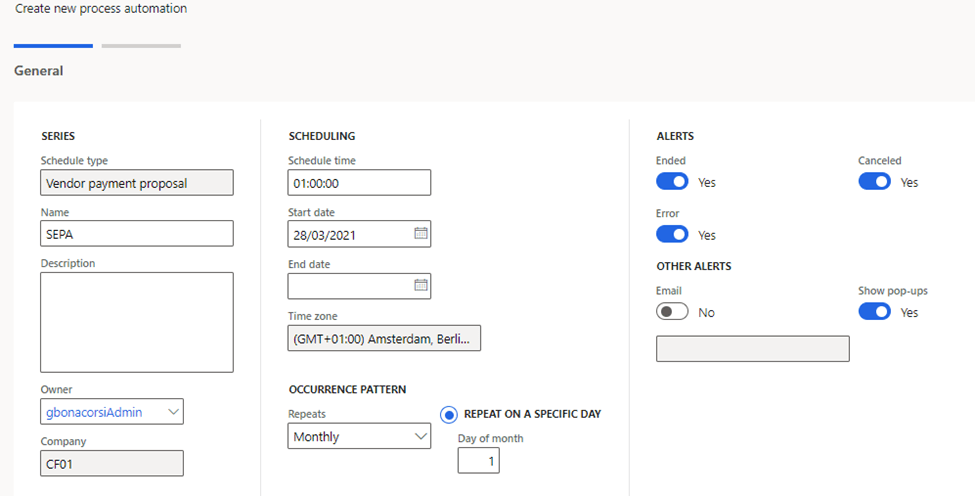
Scheduling: Now insert the information about the scheduling process:
- Name: Process’ name;
- Description: Process’ description;
- Owner: User owners of the process;
- Schedule time: Hour, minute, and second to schedule to process;
- Start: Start date;
- End date: End date;
- Repeat: Repeat daily, weekly, or monthly;
- Repeat interval: It’s based to repeat periodicity. If it daily, insert after how many days, D365FO should repeat the cycle. If it’s monthly, how many months and at least if it’s weekly, select the specific day of each week;
- Ended: D365FO trigger a message each time the process will be ended;
- Canceled: D365FO trigger a message each time the process will be canceled;
- Error: D365FO trigger a message each time there is an error;
- Email: Insert the email to receive the message;
- Show pop-ups: Show pop-ups as a message.
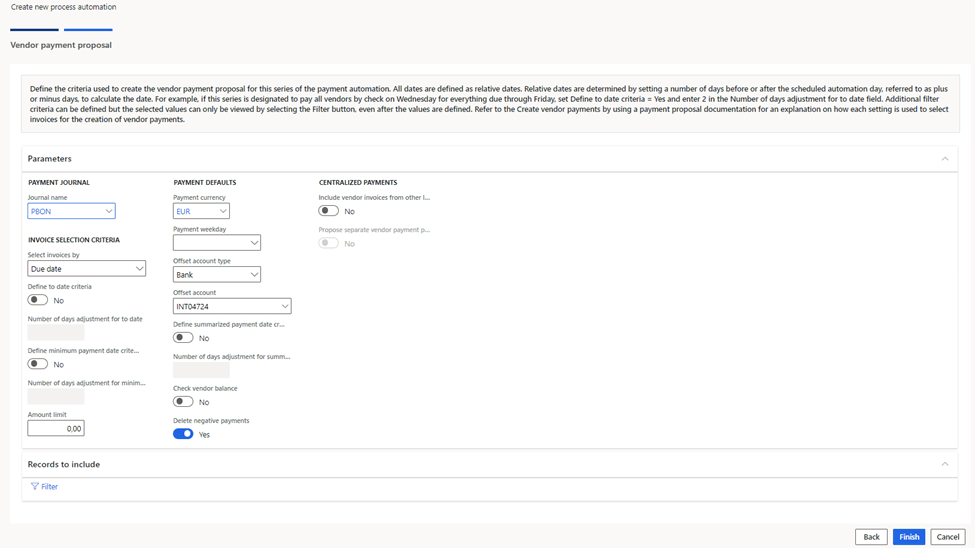
3) Payment proposal setup: The purpose of the automatic process is to create a vendor payment journal and automatically perform a payment proposal. So, now, we are going to configurated the criteria to do the automatic payment proposal:
- Journal Name: Select the payment journal to use;
- Select invoice by: Select “Due date”, “cash discount date” or “Due Date and cash discount date”;
- Define to date criteria: If “No”, D365FO considers only the date recover from the run time. If “Yes”, it’ll add the number of days set on “Number of day adjustment for to date”;
- Number of day adjustment for to date: Number of day (positive or negative) to add to run processing date as a reference;
- Define minimum payment date criteria: If “Yes”, consider a minimum number of days before or after the processing date as minimum date;
- Number of days adjustment for minimum: Number of day (positive or negative) to add to run processing date as limit date;
- Amount limit: Maximum amount.
- Payment currency: Currency;
- Payment weekday: Day of payment on the week;
- Offset account type: Type of offset account;
- Offset account: Select the offset account;
- Define summarized payment date criteria: Flag to adjust the payment day to insert on the journal;
- Number of day adjustment for summarized: Number of days (positive or negative) to add to run processing date as payment day;
- Check vendor balance;
- Delete negative payment: Delete negative open invoice;
- Include vendor invoice form other: Activate the cash polling;
- Propose separate vendor payment per legal entity: Each legal entity has a different proposition;
- Record to include: It’s possible to add other filter;
Manage the schedule
Go to: Accounts payable> Payment setup> Process automations.
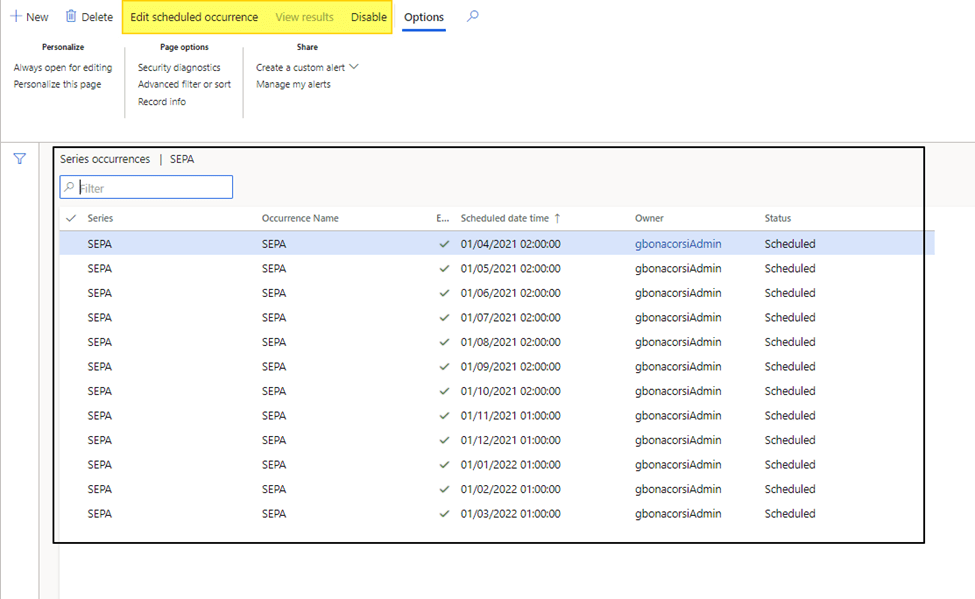
After the creation of the scheduling, it’s possible to go forward to inquiries information about. It’s possible to see the process previously created and edit/delete it.
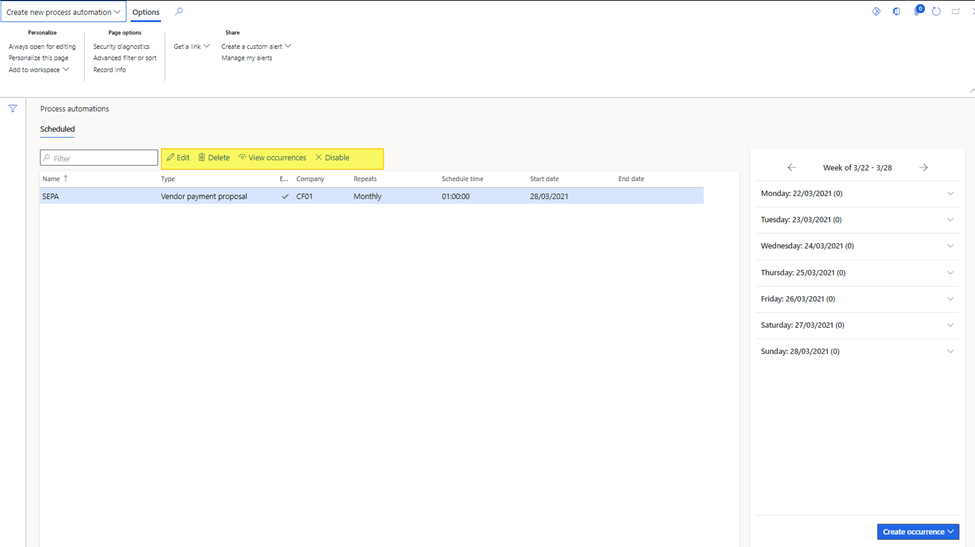
Therefore, for each schedule we can view the occurrence details pressing on “view occurrences”. We can edit the schedule or disable it:

Leave a comment