
Solution D365FO
This article is part of a larger set of articles where we speak about how to insert the payment journal in D365FO: https://daxmsdynamics365.wordpress.com/2024/09/26/customer-and-vendor-payment-options/
Manual payment is a situation where the user can insert a payment directly to the vendor without considering the invoice. However, matching the payment and the invoice is mandatory for the company. Therefore, after the payment, we have to go through the customer/vendor master data and do the match manually.
This is particularly true when we have a payment, but for whatever reason, the invoice has not yet been posted, or we are unsure which invoice it refers to.
The example below refers to the customer payment journal. However, the logic is identical for the vendor payments.
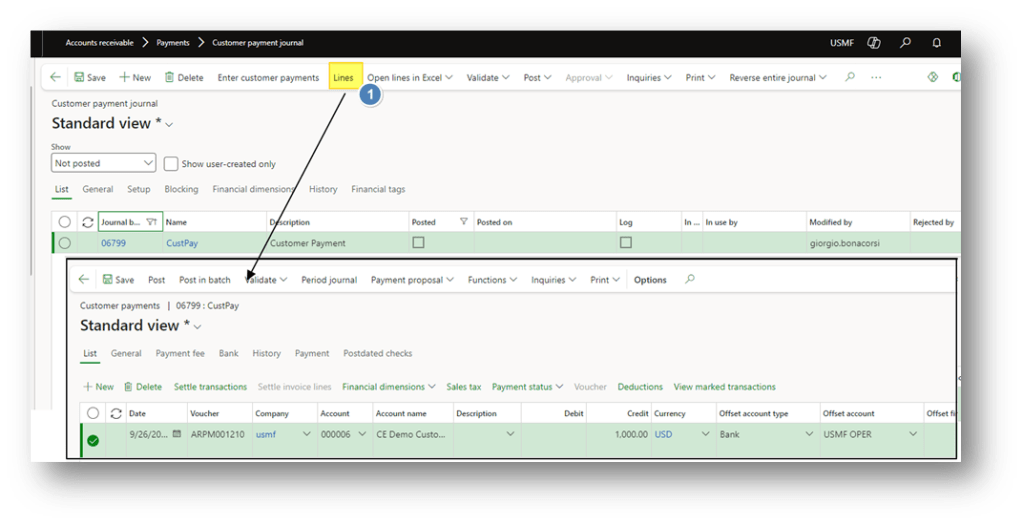
Insert the payment journal
Go to: Account receivable> Payment> Customer payment journal or Account payable> Payment> Vendor payment journal.
We create our journal and jump on the line to insert “directly” the payment specification. At this point, the payment information that we have at least to insert is:
- Date: It’s the transaction date;
- Customer/Vendor master data: Insert the customer ID
- Financial dimension: Financial dimension related to the customer’s main account (inherited from the customer master data);
- Credit: Amount of the collection
- Currency: Payment currency (inherited from the customer master data)
- Offset account: Insert our bank
- Offset financial dimension: Financial dimension to apply to the bank’s main account (inherited from the bank master data);
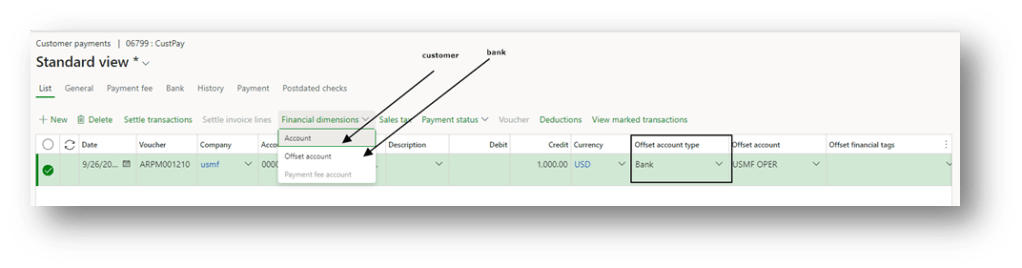
About the financial dimension, they are available by pressing the button “Financial dimension”:
But we have to be clear because a manual operation doesn’t mean that it is simpler. On the contrary, it means that the user should manually insert all fields involved in the payment. The number of fields to manage can increase based on the payment method involved. For example, typically, for the bill of exchange, the request also involves managing the customer’s bank account.
When we finish, we can proceed with the posting.
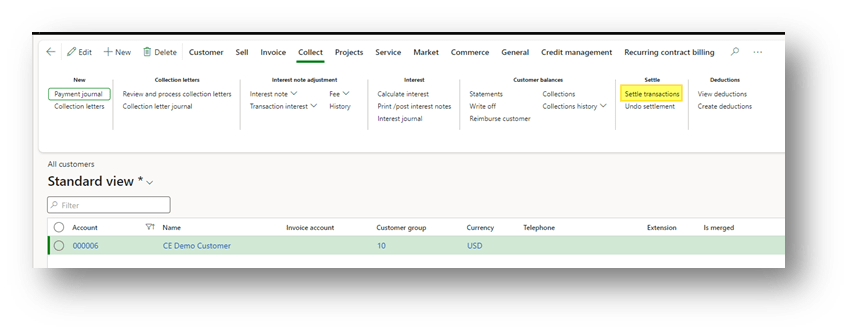
Match
Go to: Account receivable> Customers> [select the customer] or Account payable> Vendors> [select the vendor].
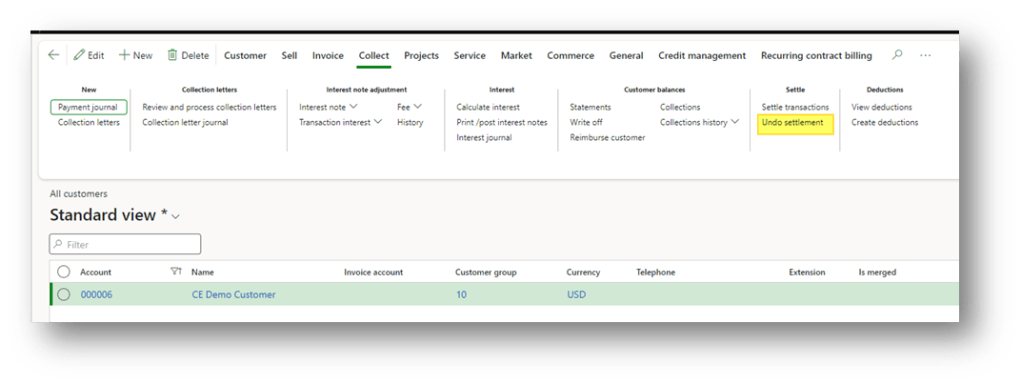
From the account receivable module, we have to go to the tab “collect” and press “Settle transaction” to match the payment with the invoice. From the account payable, we have to go to the tab “invoice” and press “Settle transaction” to match the payment with the invoice:
We select the invoice to match, and we can play with the amount to match if we want to do a partial matching. Then, proceed with the selection of the invoice to match:
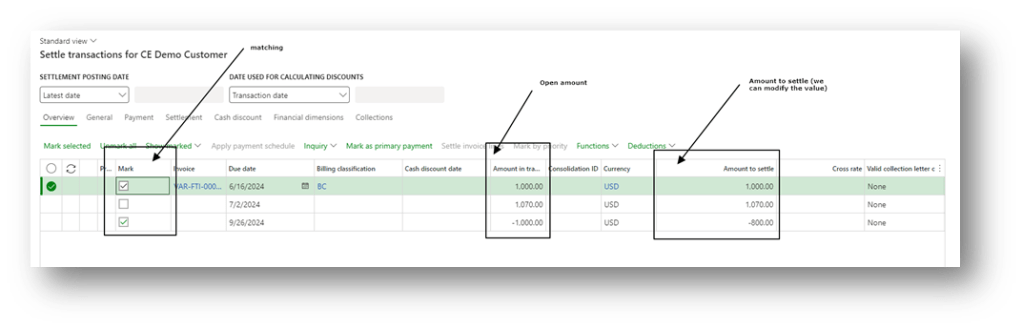
When we finish, we can press “Post” to do the matching.
Undo the matching
Go to: Account receivable> Customers> [select the customer] or Account payable> Vendors> [select the vendor].
From the account receivable module, we have to go to the tab “collect” and press “Settle transaction” to match the payment with the invoice. Bu from the account payable, we have to go to the tab “invoice” and press “Settle transaction” to match the payment with the invoice:
Here, we select the invoice or the payment that we want to unsettle. Note that is not necessary to select both because it is enough that we select one of then after the system automatically marks the connected document:
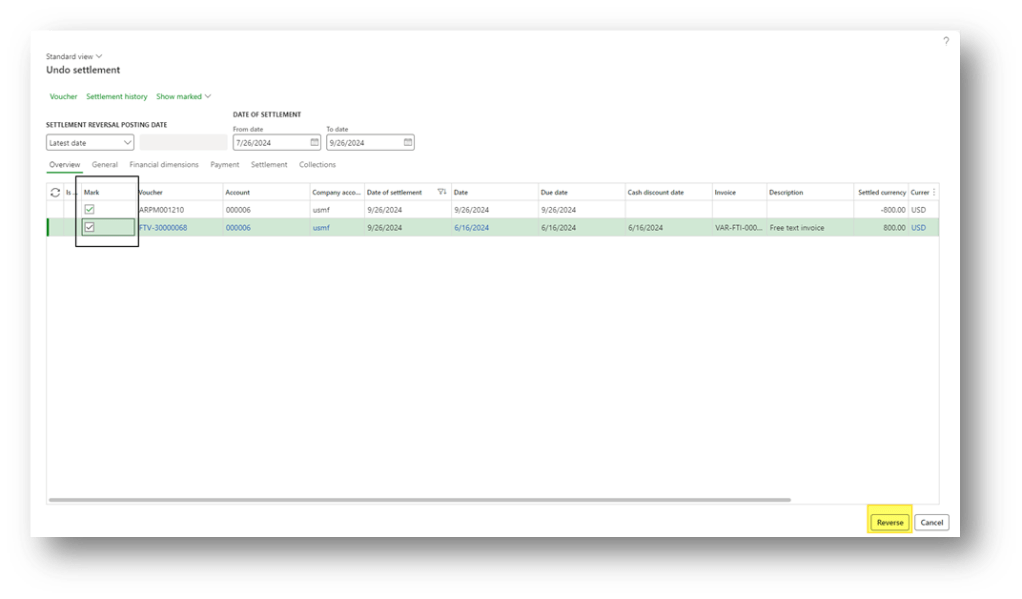
Press “reverse” to undo the matching.

Leave a comment