
Business requirement
The customer invoicing process should be as smooth as possible. Usually, during the go-live phase, it’s recommended to trigger invoice posting manually at first, to ensure the correct invoice is sent to the right customer.
However, at a later stage, the document issuance should follow an optimal cadence. To achieve this, we can leverage automatic posting and sending. From an architectural standpoint, there are batchs process to leverage, but the configuration criteria must be set in two different places:
- Invoice to Post: We may have different cases depending on the type of transaction, each with its own criteria. For example, some customers may require weekly invoice posting, while others require it monthly. This criterion defines which transactions should be invoiced, the level of data aggregation into a single invoice and at what recurrence.
- Invoice Layer: We can have multiple invoice layers (e.g., based on brand, sales pool, etc.). This criterion identifies which layout to use based on the type of transaction.
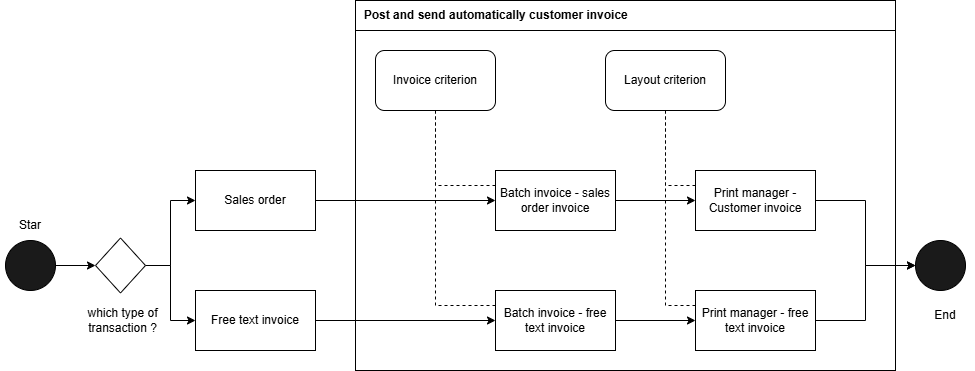
Here is an high level prospective of the OOB solutions. Notice that the printing of the invoice is separate from the posting. That’s because we can decide into our batch if we want even to print or not the invoice:
Solution D365FO
Batch invoice
Go to: Account receivable> Invoices> Batch invoice> Invoice.
We can create a batch job to automatically post sales order invoices. As you can see, there are several parameters that can be configured, but let’s move forward and focus on the most important ones:
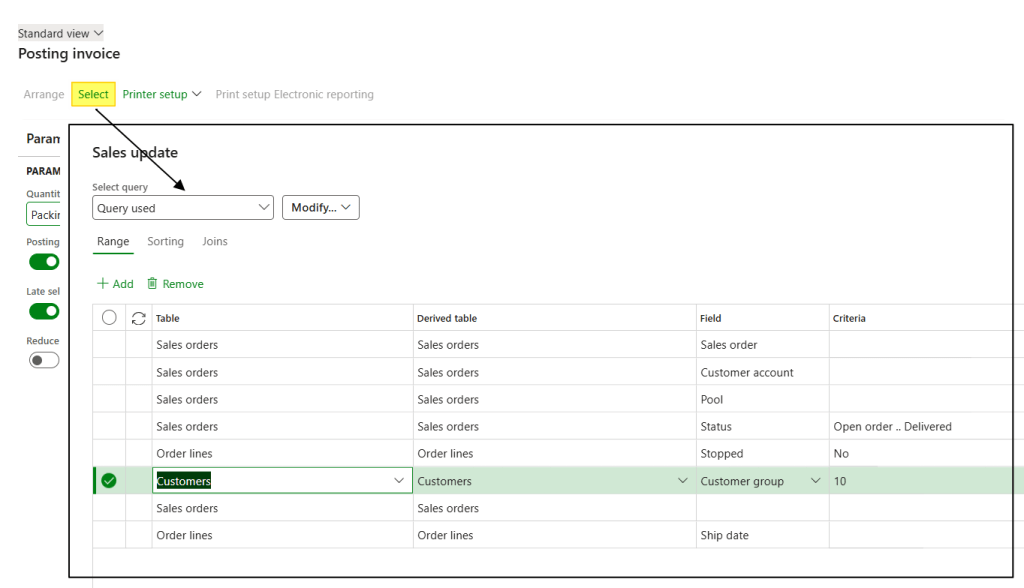
- Criterion based on sales order and customer data:By clicking Select, we can add filtering criteria based on information available in the sales order and customer master data. In this example, we are specifying the following conditions:
- Include all sales orders from Open Order to Delivered status
- Only include sales order lines that are not stopped
- Filter by Customer Group equal to 10 (notice I did a join to add the customer master data as criteria)
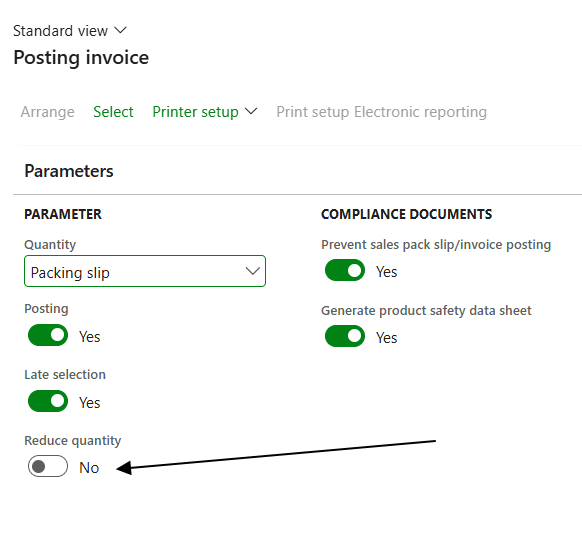
- Criterio based the quantity to include: Choose which quantity type should be considered for invoicing:

If the quantity policy is different from “packing slip”, we can even decide whether to reduce or not the delivery quantity during the posting:
That concludes the criteria used to define the scope of transactions to include in the posting. However, there are other important parameters worth mentioning:
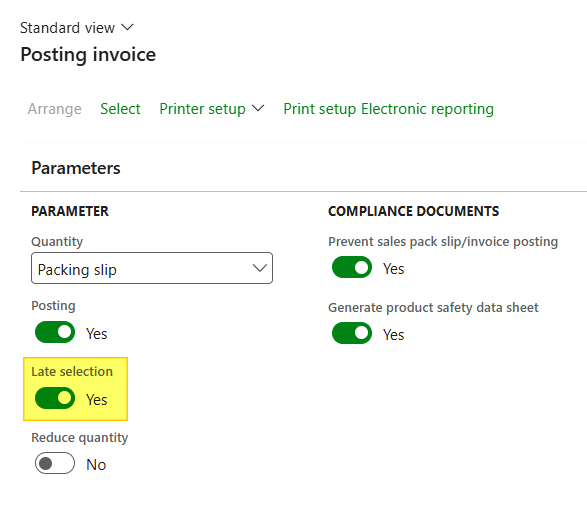
- Last selection: We need to select this option if we are using the batch process, in order to indicate to D365FO that the invoice criteria defined above should be applied:
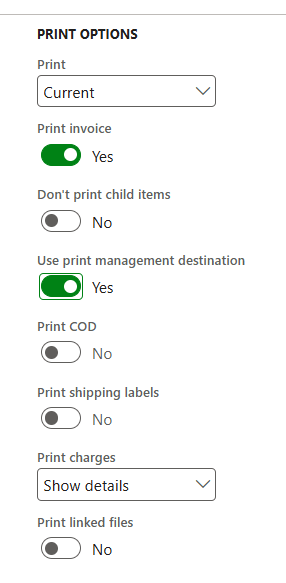
- Print and print manager: Select this option if you want to print the invoice during posting, and also define how it will be printed by leveraging the Print Management settings (highly recommended):
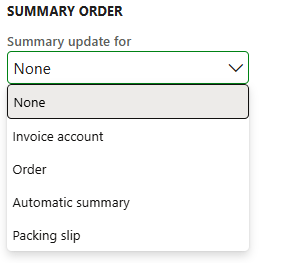
- Summery order: A really important setup! This defines how transactions will be aggregated into invoices. For example, should we generate one invoice per sales order, or aggregate transactions based on alternative criteria:
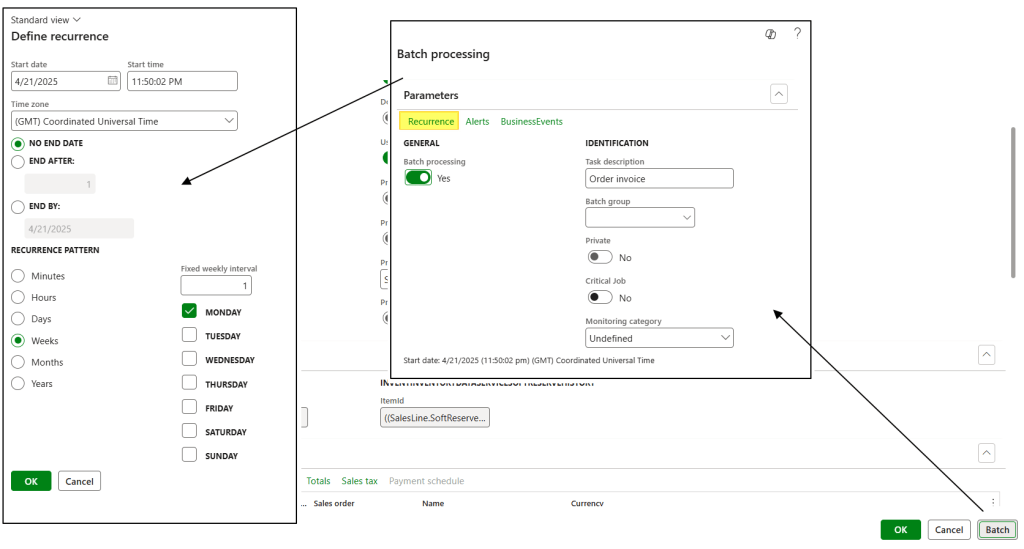
Once the batch setup is complete, we can run it in batch mode. During the batch definition, we will also define its recurrence:
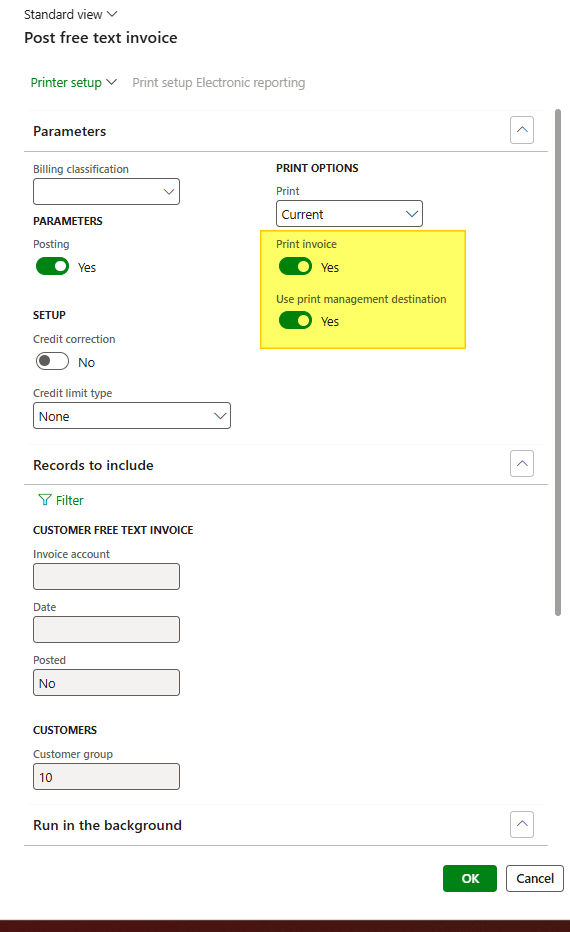
Post free text invoice
Go to: Account receivable> Invoices> Batch invoice> free text invoice
We can create a batch job to automatically post free text invoices. As you can see, there are several parameters that can be configured, but let’s move forward and focus on the most important ones:
- Criterion based on free text and customer data: In the Records to include section, we will define the criteria to identify which free text invoices should be included:
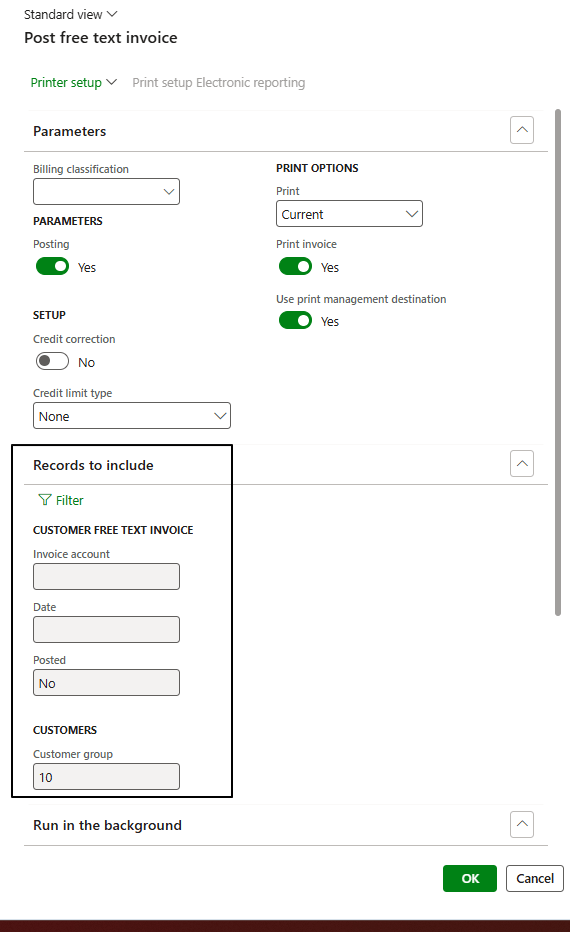
- Print and print manager: Select this option if you want to print the invoice during posting, and also define how it will be printed by leveraging the Print Management settings (highly recommended):
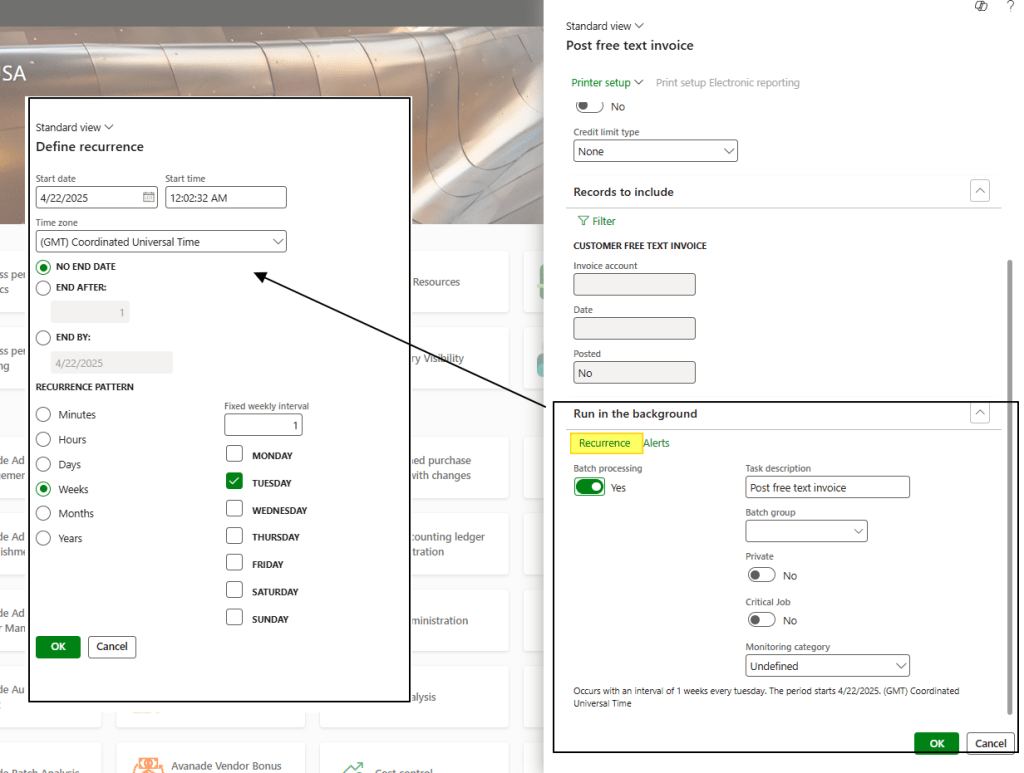
Once the batch setup is complete, we can run it in batch mode. During the batch definition, we will also define its recurrence:
Print management
Go to: Account receivable> setup> Forms> Form setup> Print manageement
The layout used for sales orders is Customer Invoice, while for free text invoices, we use the Free Text Invoice layout, as the name suggests. The configuration process is the same for both:
- Create layout criteria: We first need to create the original layout. Then, as a child layout, we can create additional roles. It is within the child layout that we define the criteria for the layout:
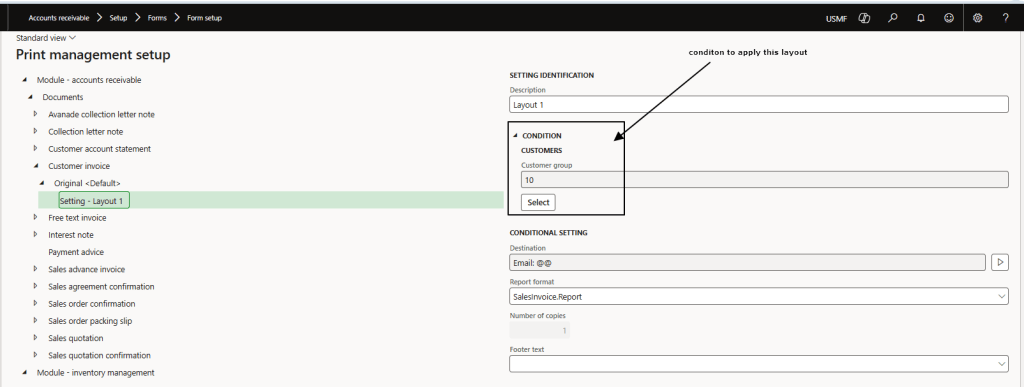
- Layout: Select the layout to use:

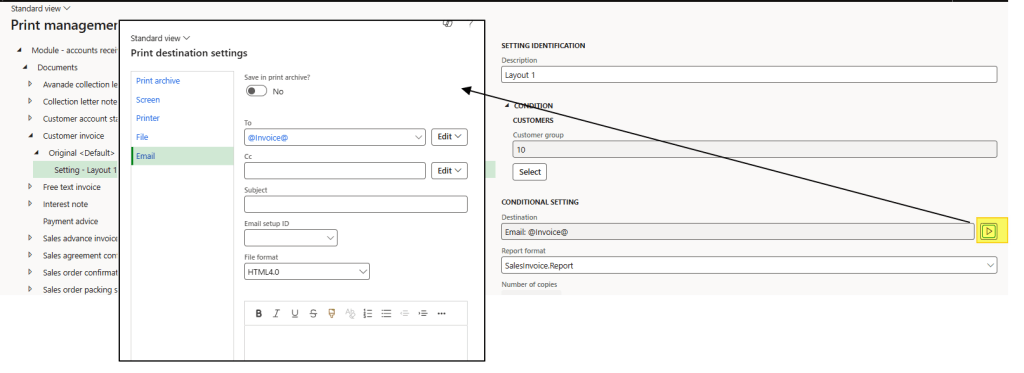
- Destination: Select the method for sending the invoice. For example, you can send it to the customer’s business address. In this case, we will send the invoice via email to the customer’s email address with the invoice proposal:

Leave a comment