
Business requirements
Commonly, the company want to restrict the palette of items sellable based on which kind of customer we would like to deal with. For example, some items are sold only to B2B or B2C customers, or items may be restricted to certain client’s region. Into the system prospective, we release all the product into our company, but at the moment to insert the sales documents we will apply a level of validation to check if the combination of client/product is valid.
Solution D365FO
D365FO propose a new feature concerning validation of the combination of client/product during the selling. It is available from the version 10.0.44, and this validation can be applied on the sales agreements, sales quotations and sales orders.
Before to go deep dive into the process and configuration explanation, let’s show an overview of the solution components:
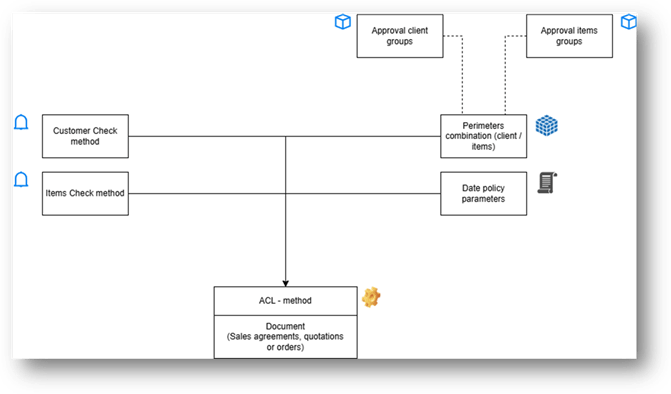
| Component | Description | Level application |
| Customer Check method | We specify if we want to apply a validation method concerning this customer into the future documents. Indeed, if we enable it, we can choose if we want to apply a warning notification rather blocking the document | Customer table |
| Items Check method | We specify if we want to apply a validation method concerning this item into the future documents. Indeed, if we enable it, we can choose if we want to apply a warning notification rather blocking the document | Items table |
| Perimeters combination | Records of customer and items combination allowed. There are several ways to configurate it, and we can even use customer, and items group. The combinations have a period of validation, that can eventually expire. | Customer/Items Table Customer/Items Group |
| Approval client groups | This component is optional. We can leverage approval client groups. That’s help the combination definition | Customer group |
| Approval items groups | This component is optional. We can leverage approval item groups. That’s help the combination definition | Item group |
| Date policy parameters | Set which document’s date should we use as reference to compare with the combination record’s period. We can use as reference the today date (insertion date), requested ship date, request receipt date or order date. This policy is applied on all documents (hence, OOB is not possible to have a date policy for a specific type of document and another for order documents). | ALL documents |
| ACL method | If the check is enabled, at least into the customer or item master data, the system will check if the document structure is consistent with the combination configurated. Notice: in case of conflict between two check method the system for prudence will apply the stricter one. For example: if one is set as warning, and the order as blocking, the system will block the document. | ALL documents |
Business process
Actives
ACL – Validation
On the business process perspective, the impact is adding a validation during the creation of our sales document (sales agreements, sales quotations and sales orders). The ACL is applied during the saving, before to go forward with further step (confirmation, picking, etc…) :
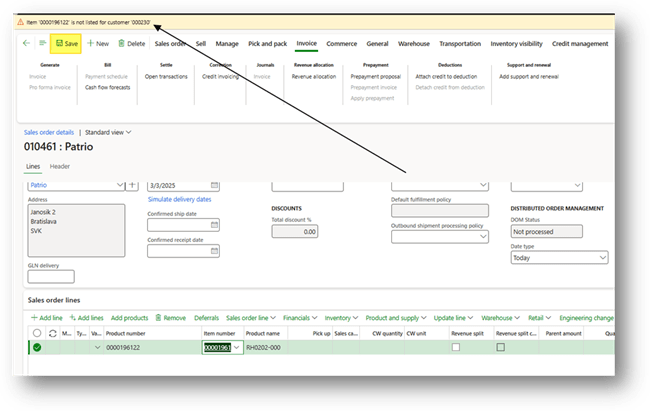
Based on the configuration that we have done, the system will return:
- No message: situation ok, we can go ahead.
- Warning: we can go on, but there is a warning. Up to the user decide what to do.
- Block: we can not go forward because the client/item combination is invalid.
Inquiries
We can perform inquiries from the customer or items master data, and see which elements are valid and can use into our future documents.
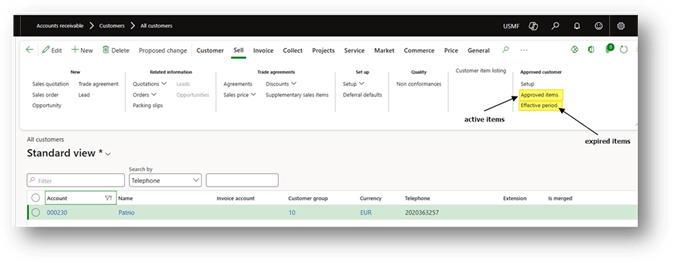
Customer mater data
Go to: Accounts receivable> Customers> All customers.
From here, we can see the items not yet expired tied to this customer, or
the items assigned but expired:
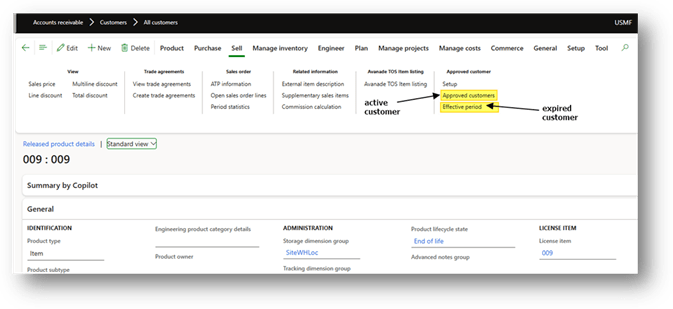
Item master data
Go to: Product information management> Products> Released products.
From here, we can see the customers not yet expired tied to this item or
the customers assigned but expired:
Configuration
Activate feature
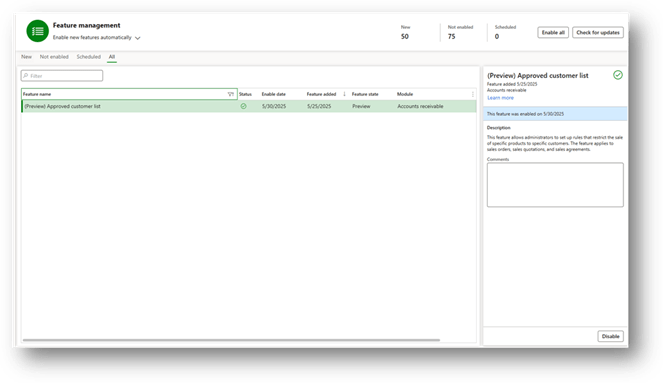
Go in: System administration> Feature management.
Activate the feature “Approved customer list”:
Approved customer list
Go to: Sales and marketing> Customers> All customers.
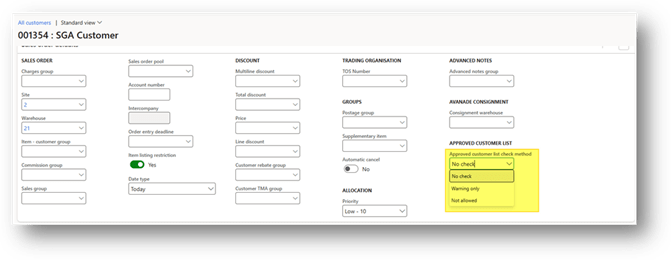
We can set from here the customer check method. Scroll down until “Sales order default” and into “Approved customer list check method” choose either enable the validation or which kind of check to apply on our documents. We can choose between:
- No check: No validation request.
- Warning only: Return a warning if the combination client/items is invalid.
- Not allowed: Blocking if the combination is invalid
Approved items list
Go to: Sales and marketing> Customers> All customers.
We can set from here the item check method. Scroll down until “Sell” and into “Approved customer list check method” choose either enable the validation or which kind of check to apply on our documents. We can choose between:
- No check: No validation request.
- Warning only: Return a warning if the combination client/items is invalid.
- Not allowed: Blocking if the combination is invalid

Approved client groups
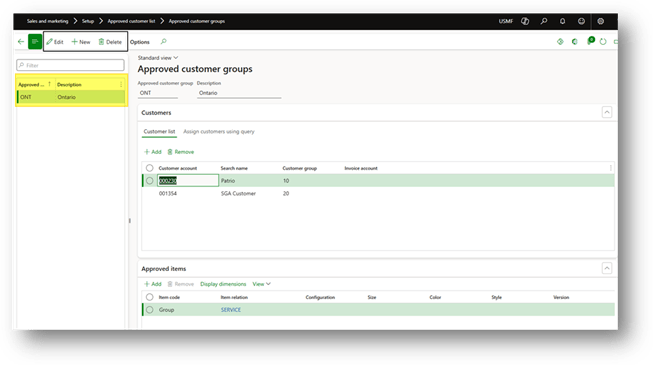
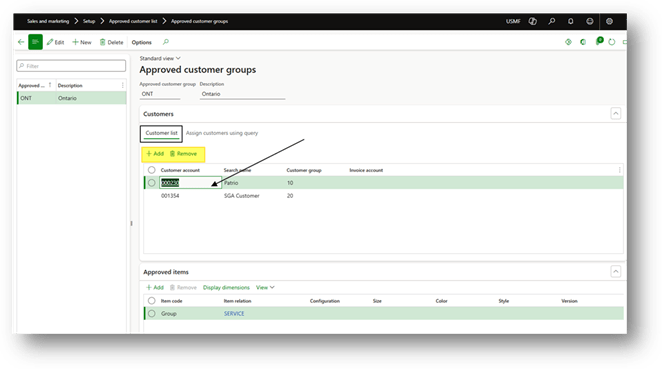
Go to: Sales and marketing> Setup> Approved customer list> Approved customer group.
We create here our approved client’s group. Considering that these groups are dedicate only for this feature.
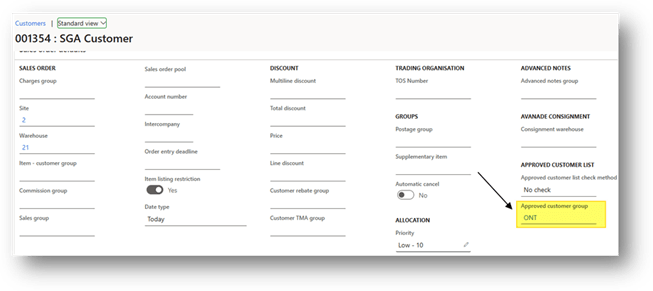
There are different ways to assign the group at our customer. Firstly, we can jump directly into the customer master data and select the group
However, an alternative way is to do it directly from the approved client groups. From here we can add on the group the customer manually one by one:
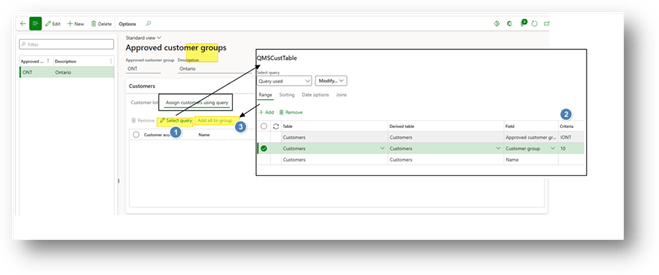
But it’s even possible to massively add them using the “assign customer using query”. Select the inquiries to individuate the customers, and then press into “add all to the group”
Approved item groups
Go to: Product information management> Setup> Approved customer list> Approved item groups.
We create here our approved item’s group. Considering that these groups are dedicate only for this feature.
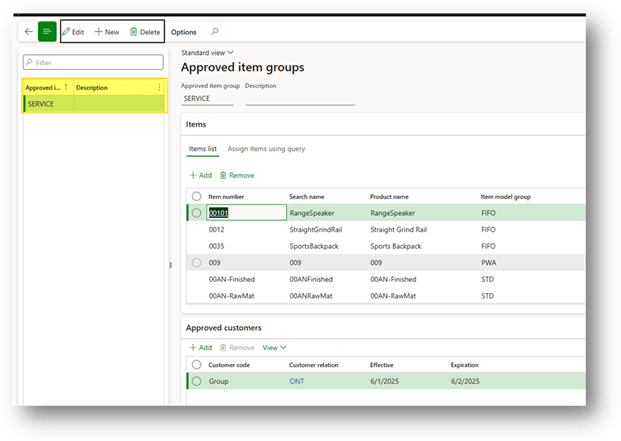
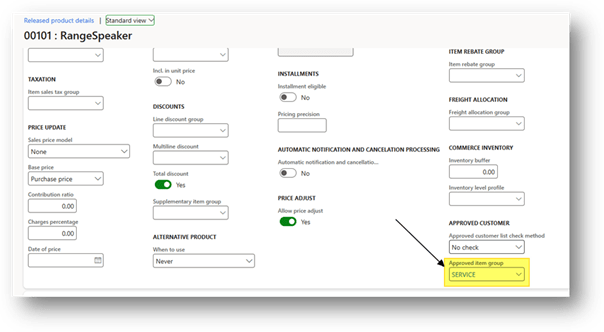
There are different ways to assign the group at our items. Firstly, we can jump directly into the product release master data and select the group
However, an alternative way is to do it directly from the approved item groups. From here we can add on the group the customer manually one by one:
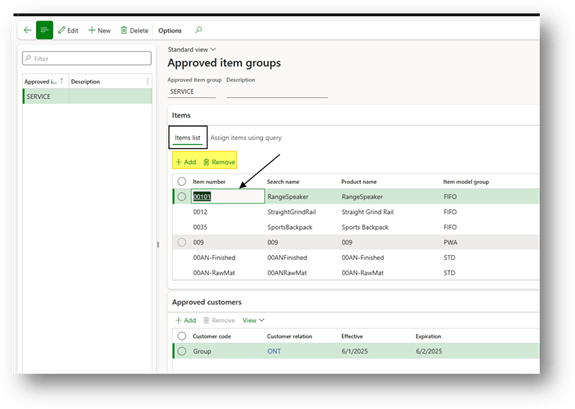
But it’s even possible to massively add them using the “assign items using query”. Select the inquiries to individuate the items, and then press into “add all to the group”

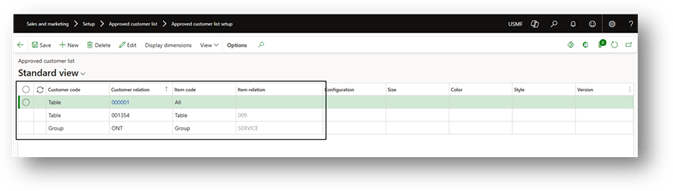
Approve customer list setup
Go to: Sales and marketing> Setup> Approved customer list> Approved customer list setup OR Product information management> Setup> Approved customer list> Approved customer list setup.
That’s the core configuration of the feature, because is from here that we insert the valid combination of client and product. We insert record where each one reflects a valid combination. For each of them we can specify the level of details concerning the clients/items involved:
- Table: single client/item master data.
- Group: approved client-items groups
- All: All client and customer
We notice about the items that possible to add further attribute as criteria (size, color, etc..)
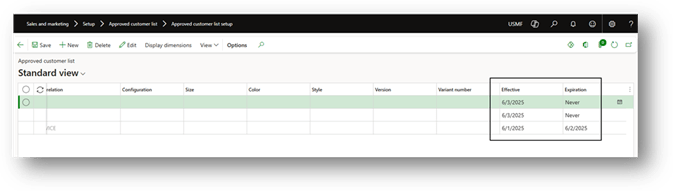
At the end, for each record we must insert the start date (effective date) and end date (expiration):
Another form where we can quickly add this configuration is from the client/item groups. It’s the same, but we pull in the record configuration directly on the last session:

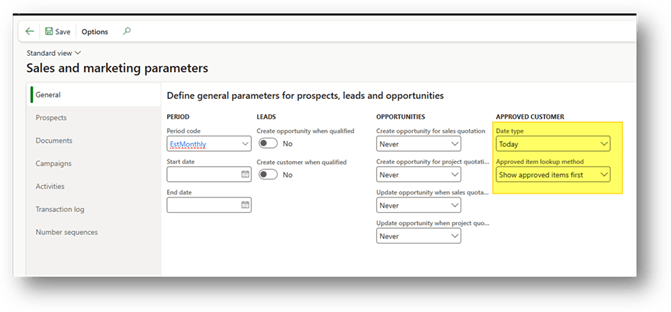
Sales and marketing parameters
Go to: Sales and marketing> Setup> Sales and marketing parameters.
Here we can select the date policy, so the document reference date to use to compare with validate period of our combination. The date available are:
- Today:
- Requested ship date
- Requested receipt date
- Order date
It’s even possible define when we lookup the items from the customer master data the sort policy (that’s affect the performance):
- Show approved items first
- Show all items first
- Do not show approved items

Leave a comment