
Introduction
To integrate D365FO with an external application, the first step is to register the application in Azure Active Directory. Once completed, you can then register it in Microsoft Dynamics 365 Finance and Operations. This article details the configuration process.
Configuration
Azure- App registrations
Before starting, note that the following information is required to set up the integration (we’ll show you how to find them during the configuration):
- Tenant ID: Azure tenant where your company solutions (ERP, CRM, etc.) are hosted.
- Application ID: ID of the registered application.
- Secret ID: Secret ID within the application.
- Secret: Secret password
Register application
Open the azure portal: https://portal.azure.com/
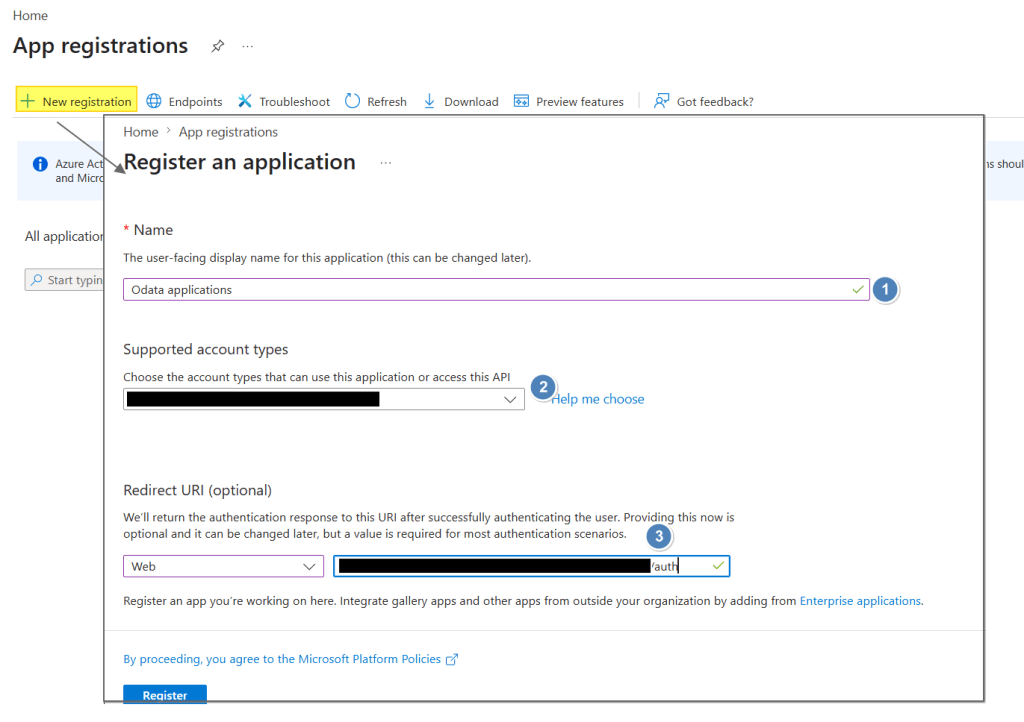
Run the “App registration”, and do a new registration. From here we need to insert:
- The name of our app;
- Select the tenant (it should be same tied to D365FO);
- Insert the {environment URL + /auth}. It is the path call by our application to ask for authentification.
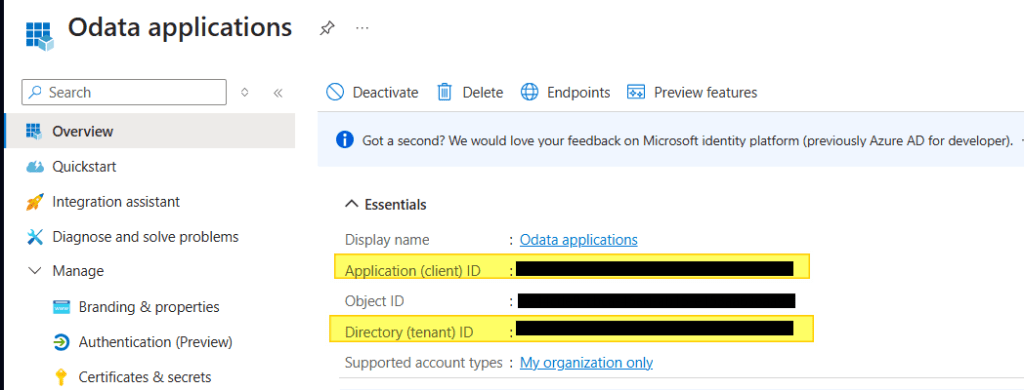
Once created, we can find the Tenant and the application ID:
Create a new client
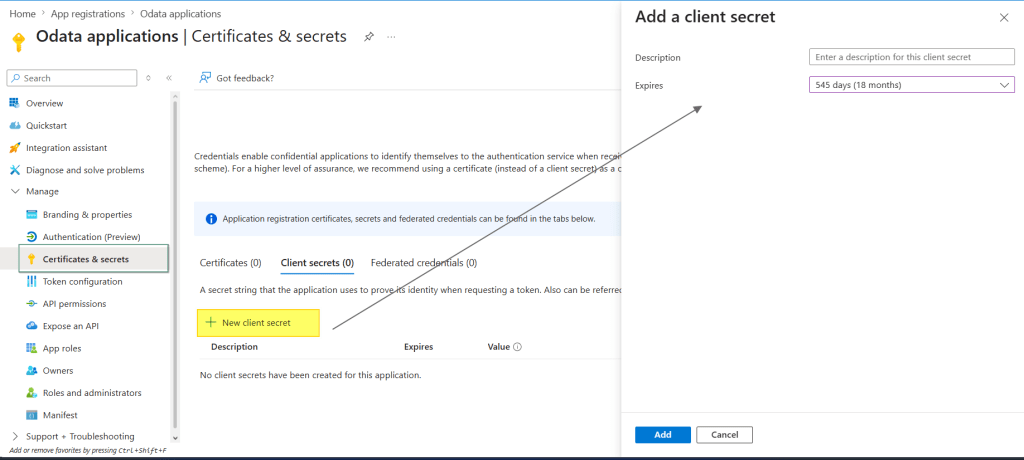
Click in “Certificates & secrets”, and from here create a new client secret (choose the expiration option that you prefer):
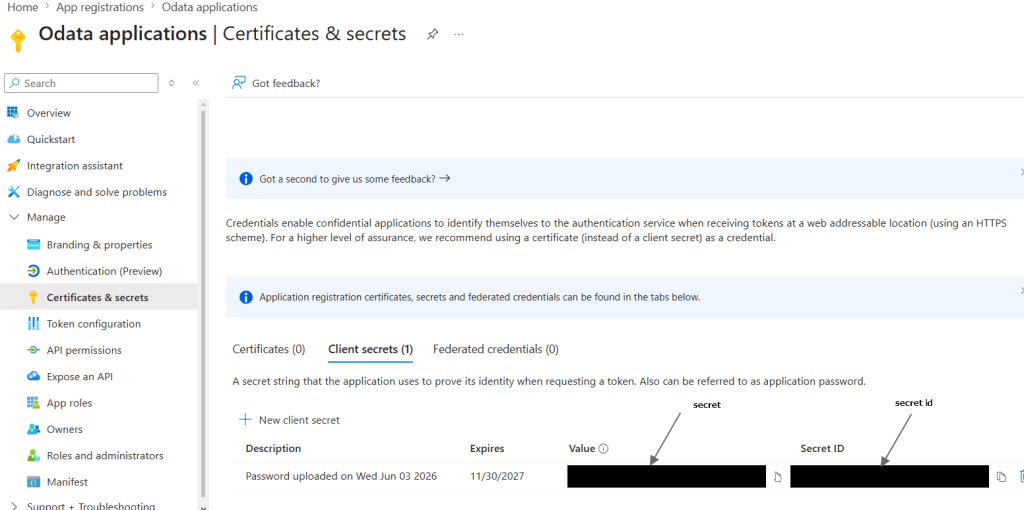
Copy now the Client and Secret Id in a safe place:
Enable permissions
Now we need to allocate permission to work in D365FO.
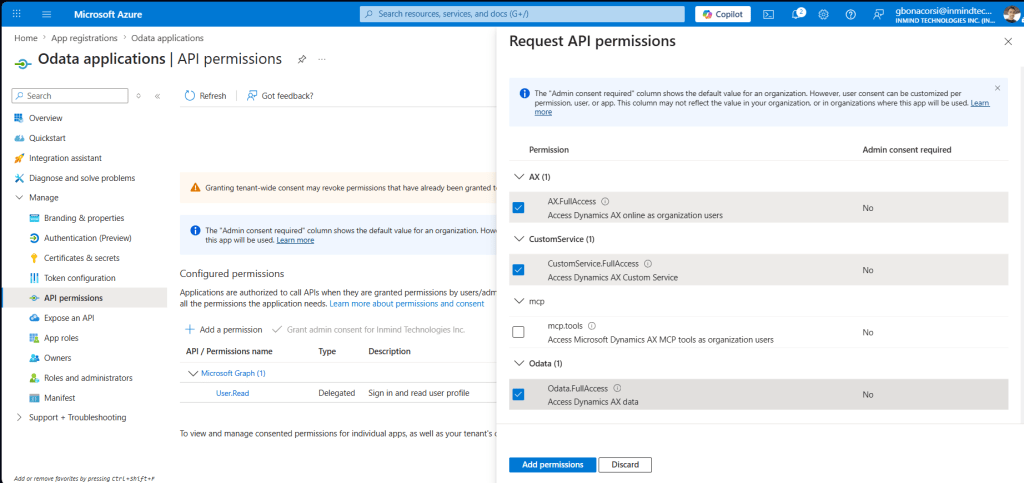
Click in “API permission”, and select “Dynamics ERP:

Select “delegated permission” (we will log-in in D365FO like a user), and mark the permission. In our case, for the data integration I’ve added as permission: “AX FullAccess”, CustomerService.FullAccess”, and OData.FullAccess:
D365FO- Microsoft Entra ID
Register application
Path: System administration > Setup > Microsoft Entra ID applications
Register your application here. Enter the Client ID and link it to a user in D365FO (typically an admin user created for this purpose).


Leave a comment